


How do I achieve natural, appetizing light for my Visual Bites food photos?

The Foundation: Understanding Natural Light
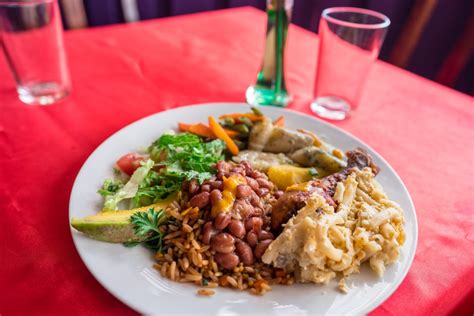
For any food photographer, especially those creating tempting Visual Bites, light is the most critical ingredient. It can elevate a simple dish to an art form or make a culinary masterpiece look dull and unappetizing. The secret to achieving that coveted natural, appetizing glow often lies in harnessing the power of natural light. Forget complex studio setups and expensive strobes – your best friend is often right outside your window.
Natural light, typically from a window or an open doorway, offers a soft, diffuse quality that artificial lights often struggle to replicate. It provides a beautiful gradient of shadows and highlights, enhancing texture and depth, making food appear fresh, vibrant, and utterly irresistible. The goal is to make your viewer almost taste the food just by looking at the photo.

Finding Your Optimal Light Source
The first step is to identify the best natural light source in your home or studio. Look for a large window that doesn’t receive direct, harsh sunlight. North-facing windows are often ideal as they provide consistent, indirect light throughout the day. East-facing windows are great in the morning, and west-facing windows are perfect in the late afternoon, but both can have strong direct light at certain times. South-facing windows often have direct, strong light that needs significant diffusion.
Position your food setup close to the window, but not directly in the path of sunlight. You want the light to wrap around your subject gently. Experiment with different distances from the window; moving closer will result in softer light, while moving further away will give you harder light and deeper shadows.
Mastering Diffusion: Softening Harsh Light
Even indirect window light can sometimes be too strong, creating harsh highlights and deep, unflattering shadows. This is where diffusion comes in. A simple sheer white curtain can work wonders to soften the light. If you don’t have one, a piece of white parchment paper or even a white bedsheet taped over the window can act as a DIY diffuser.
Professional diffusers are also readily available and offer more control. The key is to place the diffuser between your light source (the window) and your food. This scatters the light, making it more even and gentle, reducing harsh reflections, and creating a more pleasing, appetizing look for your Visual Bites.
Shaping Light: Reflectors and Fill
Once you’ve diffused your main light, you might notice that one side of your food still appears darker or has shadows that are too strong. This is where reflectors come into play. A reflector bounces light back onto your subject, filling in shadows and adding a subtle lift to your food.
The simplest reflector is a piece of white foam board, a white poster board, or even a plain white sheet of paper. Position it opposite your light source, angled to bounce light back onto the darker areas of your dish. For a slightly brighter, more specular fill, you can use aluminum foil crumpled and then flattened over a piece of cardboard. Conversely, if you want to deepen shadows and add more mood, a black card can be used as a ‘negative fill’ to absorb light.
The Power of Directional Lighting
The direction from which the light hits your food significantly impacts the final image. Different angles create different moods and highlight various aspects of the dish:
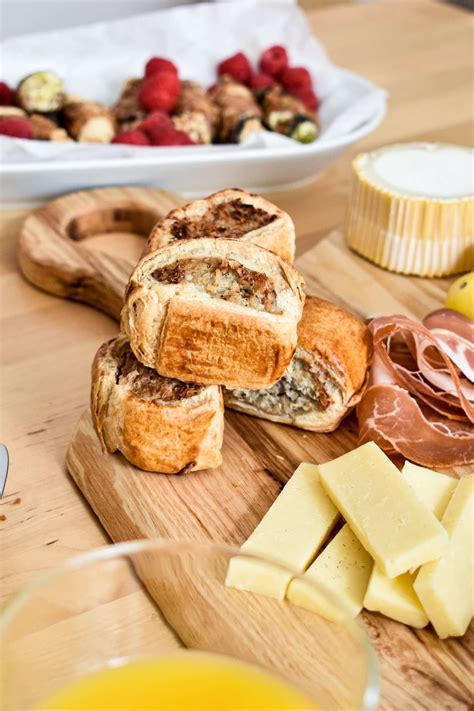
- Backlighting: Positioning the light source behind your food (and slightly to the side) is often the most flattering for food. It creates a beautiful rim light around the edges, highlights textures, and makes liquids sparkle. It also creates attractive, elongated shadows that add depth and drama.
- Sidelighting: Placing the light source to the side of your food emphasizes texture and dimension. It’s excellent for showcasing layers in a cake, the crust of bread, or the intricate details of a garnish.
- Front lighting: Generally, direct front lighting is less desirable as it can flatten your food, removing shadows and making it appear two-dimensional and uninteresting.
Experiment with rotating your food setup relative to the window to find the most appealing angle that brings out the best in your Visual Bites.
Timing and Environmental Factors
The time of day affects the quality and color of natural light. Early morning or late afternoon (often called the ‘golden hour’) provides warmer, softer light, which can be incredibly appealing for certain dishes, adding a cozy, inviting feel. Midday light can be harsher and cooler, requiring more diffusion and careful placement.
Also, consider your surroundings. Walls in your room can act as giant reflectors or color casts. If you have brightly colored walls, they might bounce that color onto your food, which could be undesirable. Neutral-colored walls (white, grey) are generally best for maintaining true food colors.

Practice and Observation: The Key to Perfection
Achieving natural, appetizing light for your Visual Bites is less about expensive gear and more about understanding and manipulating light. Start by observing how light falls on different objects in your home. Pay attention to how shadows are formed and how highlights appear.
Practice regularly. Set up a simple dish near a window and try different positions for your food, your camera, and your reflectors/diffusers. Take multiple shots and review them critically. What makes one photo look more delicious than another? Often, it comes down to subtle differences in lighting.
Conclusion: Illuminate Your Visual Bites
By focusing on soft, diffused natural light, understanding its direction, and utilizing simple tools like reflectors, you can dramatically improve your food photography. These techniques will help you capture the true beauty and deliciousness of your culinary creations, making your Visual Bites genuinely appetizing and stand out in the crowded world of food imagery. Embrace the natural light around you, and watch your food photos transform.


