


Best Visual Bite lighting for mouth-watering food photos?

Mastering Light for Irresistible Food Photography
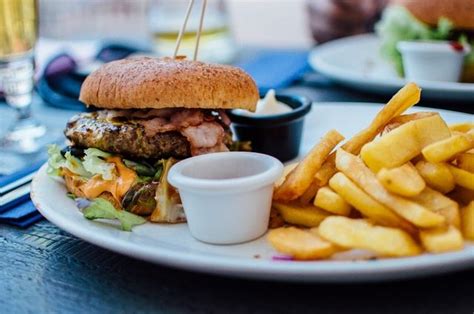
In the world of food photography, light isn’t just a medium; it’s the main ingredient that transforms a simple dish into a visual feast. The right lighting can make textures pop, colors sing, and flavors practically leap off the screen, convincing viewers to take a bite. Conversely, poor lighting can make even the most exquisitely prepared meal look unappetizing. So, how do you master the art of illumination to create those coveted mouth-watering food photos?
The Power of Natural Light
Natural light is often the holy grail for food photographers, and for good reason. Its soft, diffused quality is incredibly flattering, creating gentle shadows and true-to-life colors. The best natural light typically comes from a large window, ideally on an overcast day or during the ‘golden hour’ (early morning or late afternoon) to avoid harsh, direct sunlight. Position your food near the window, allowing the light to come from the side or slightly behind your subject.
To control natural light, use white foam boards or reflectors to bounce light back into shadowy areas, filling them gently. A sheer curtain or a dedicated diffuser can further soften harsh sunlight, preventing blown-out highlights and deep, unflattering shadows. Experiment with different angles relative to the window to see how the light interacts with the food’s form and texture.
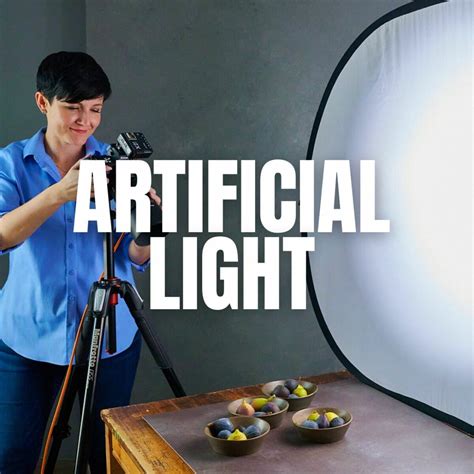
Embracing Artificial Illumination
While natural light is fantastic, it’s not always available or consistent. This is where artificial lighting comes into play, offering ultimate control and flexibility. Speedlights (flashes) and continuous LED lights are popular choices. When using artificial light, the key is to mimic the soft, diffused quality of natural light.
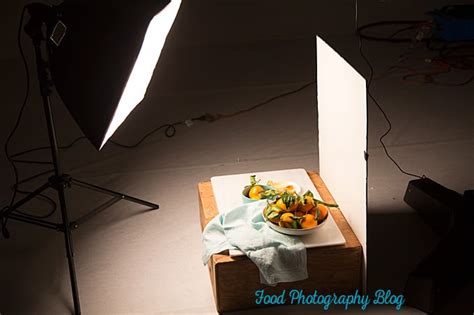
Employ large modifiers like softboxes, octaboxes, or shoot-through umbrellas. These tools enlarge the light source, making the light softer and more even. Position your artificial light source similar to how you would natural light – from the side or slightly behind the dish – to create depth and dimension. Always use a diffuser between your light source and the food to prevent harsh, unflattering hotspots.
Key Lighting Techniques for Texture and Glow
Certain lighting techniques are particularly effective for food:
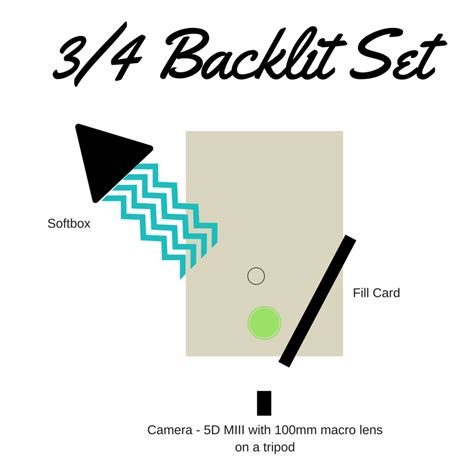
- Backlighting: Placing your light source directly behind the food creates a beautiful rim light or ‘halo’ effect, enhancing textures and making liquids appear to glow. It’s fantastic for drinks, baked goods, or anything with steam.
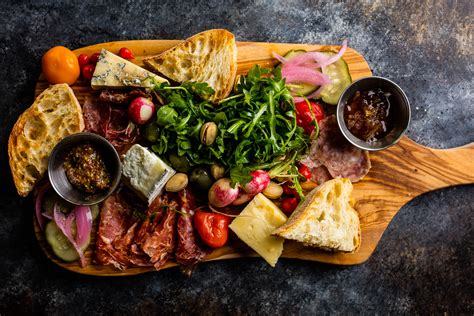
- Side Lighting: Positioning the light at a 45-degree angle to the food emphasizes texture and creates appealing shadows that add depth and dimension. This is ideal for showcasing the layers of a cake, the crust of bread, or the intricate details of a dish.
Avoid direct frontal lighting, as it tends to flatten your subject, eliminating shadows and making the food look less appealing and two-dimensional. The interplay of light and shadow is crucial for making food look three-dimensional and inviting.
Essential Tools: Diffusers and Reflectors
Regardless of whether you use natural or artificial light, diffusers and reflectors are indispensable. A diffuser scatters light, making it softer and more even, reducing harsh shadows and hot spots. This can be anything from a professional diffusion panel to a simple sheer white curtain.
Reflectors, typically white, silver, or gold surfaces, bounce light back onto your subject to fill in shadows. White reflectors create a soft, neutral fill, silver provides a brighter, cooler fill, and gold adds a warm tone. These tools allow you to sculpt the light, ensuring your food is evenly and appealingly lit without losing its natural form.
Color Temperature and White Balance
The color temperature of your light source is critical for accurate food representation. Natural light changes throughout the day, and artificial lights vary. Setting the correct white balance in your camera (or correcting it in post-processing) ensures that whites appear white and colors are true to life. An incorrect white balance can cast an undesirable blue, yellow, or green hue over your food, making it look unappetizing. Aim for a neutral and appetizing color rendition that complements the dish.
Practical Tips for Stunning Shots
- Start Simple: Begin with one light source (your window or a single artificial light) and master its use before adding more.
- Observe Shadows: Pay attention to the shadows. They define the shape and texture of your food. Soft, gradual shadows are usually more appealing than hard, abrupt ones.
- Light the Hero: Ensure the star of your dish is perfectly lit.
- Shoot Tethered: If possible, connect your camera to a computer to see your images on a larger screen in real-time, allowing for immediate adjustments to lighting.
Conclusion
The quest for mouth-watering food photos ultimately boils down to understanding and manipulating light. Whether you’re harnessing the soft embrace of natural window light or meticulously crafting a scene with artificial sources, the goal remains the same: to reveal the food in its most appealing form. By experimenting with different light sources, modifiers, and angles, you’ll unlock the secrets to creating images that not only look delicious but genuinely tell a story, making every visual bite irresistible. Keep practicing, observing, and most importantly, have fun illuminating your culinary creations!


