How do you make everyday real food dishes look stunning for your feed?

In an age dominated by visual storytelling, even the most delicious homemade meal can fall flat on social media if it doesn’t look as good as it tastes. But fear not, aspiring food stylists! You don’t need a professional studio or gourmet ingredients to make your everyday real food dishes shine. With a few simple tricks and a keen eye, you can transform your weeknight dinners and simple snacks into feed-worthy masterpieces.
Mastering the Art of Plating
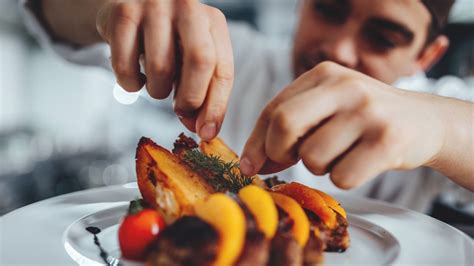
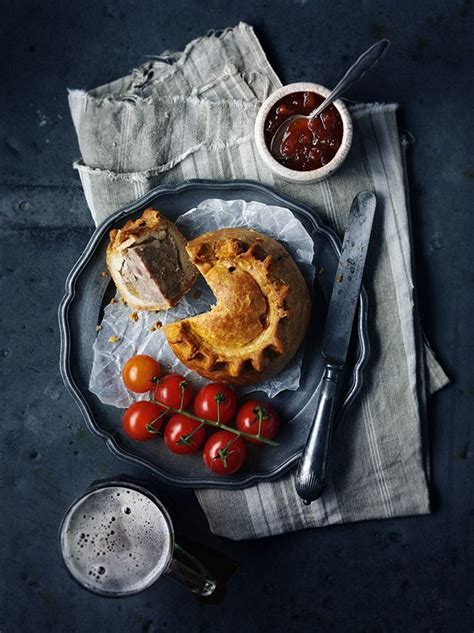
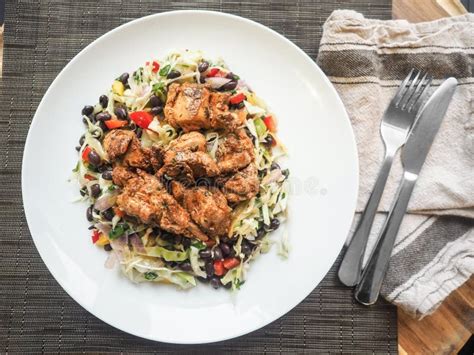
The foundation of a stunning food photo lies in thoughtful plating. Think of your plate as a canvas. Start with a clean plate—white or neutral colors often work best as they allow the food to pop. Arrange your main components with intention, aiming for balance and visual interest. Avoid overcrowding; negative space can be just as impactful as the food itself. Stack ingredients vertically when appropriate to add height and dimension, such as a perfectly layered lasagna or a stack of pancakes.
Garnishes are your best friends. A sprinkle of fresh herbs, a drizzle of contrasting sauce, a wedge of lemon, or a dash of spice can add color, texture, and a professional touch. Remember, every element on the plate should ideally be edible and contribute to the overall dish.

Harnessing the Power of Natural Light
Good lighting is paramount for food photography. The best light source for most home photographers is natural window light. Position your dish near a window, ideally one that isn’t in direct, harsh sunlight. Soft, diffused natural light enhances textures, highlights colors, and minimizes unflattering shadows. Avoid overhead kitchen lights or camera flashes, as these can create harsh glare and dull your food’s appeal.
If the natural light is too strong, use a sheer curtain or a diffuser (even a white bed sheet held up can work!) to soften it. Conversely, if you have shadows on one side, use a white piece of foam board, a napkin, or another reflective surface to bounce light back onto the dish and brighten shadowed areas.
Choosing the Right Props and Backgrounds
While the food is the star, complementary props and backgrounds can elevate your scene. Keep your backgrounds simple and uncluttered so they don’t distract from the dish. Wooden tables, rustic cutting boards, linen napkins, or even a plain wall can serve as excellent backdrops. Experiment with different textures and colors that complement, rather than compete with, your food.
Carefully selected props can tell a story and add context. Think about small, relevant items like a vintage fork, a sprig of fresh herbs, a rustic serving spoon, or a small bowl of an accompanying sauce. Don’t overdo it – a few well-chosen items are far more effective than a cluttered scene. Ensure all props are clean and fit the overall aesthetic of your dish and your feed.
Angles, Framing, and Composition
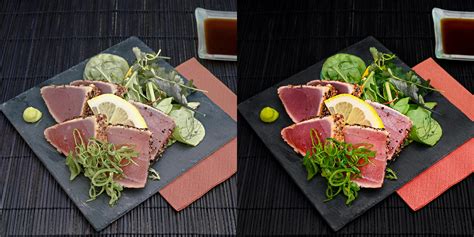
Experiment with different camera angles to find the most flattering view for your dish. Some dishes, like soups or pizzas, look best from an overhead (flat lay) perspective. Others, like tall burgers or layered cakes, benefit from a 45-degree angle or even eye-level to showcase their height and layers. Close-up shots can emphasize texture and detail, making your food look incredibly appetizing.
Consider the rule of thirds when composing your shot. Imagine dividing your frame into nine equal sections with two horizontal and two vertical lines. Place your main subject or key elements along these lines or at their intersections to create a more dynamic and pleasing composition. Don’t be afraid to crop tightly or leave plenty of negative space, depending on the story you want to tell.
Subtle Editing for a Polished Finish
Even with perfect staging and lighting, a little post-processing can make a big difference. You don’t need expensive software; many free apps on your phone offer excellent editing capabilities. Focus on subtle enhancements: adjust brightness and contrast, correct white balance if colors appear off, and boost saturation slightly to make colors pop. A touch of sharpness can bring out details.
The key is not to over-edit. Your goal is to enhance the natural beauty of your food, not to make it look artificial. Aim for consistency in your editing style across your feed to create a cohesive and professional look. A consistent aesthetic makes your entire feed more appealing and recognizable.
Practice Makes Perfect
Transforming your everyday real food into stunning visual content takes practice. Don’t get discouraged if your first attempts aren’t perfect. Keep experimenting with different angles, lighting, props, and plating techniques. Pay attention to what works for other food bloggers and photographers you admire. Most importantly, have fun with it! The more you practice, the more intuitive these techniques will become, and soon your feed will be bursting with deliciously beautiful homemade meals.