


Secrets for gorgeous recipe photos? Plating & lighting tips?

Capturing the deliciousness of your home-cooked meals in a photograph can be just as rewarding as cooking the meal itself. Beautiful recipe photos don’t just happen by accident; they’re the result of thoughtful plating and strategic lighting. Whether you’re a food blogger, home chef, or simply want to impress your friends on social media, understanding these fundamental principles will elevate your food photography from mundane snapshots to mouth-watering masterpieces.
The Foundation: Mastering Plating Techniques
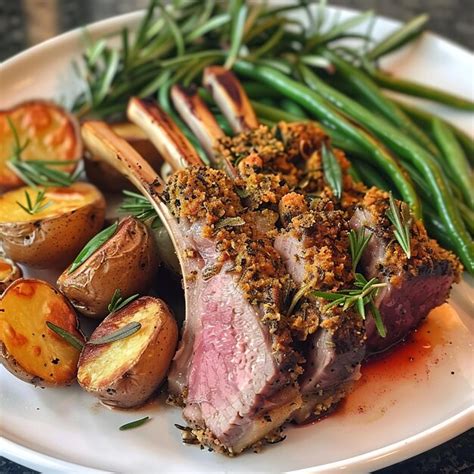
Plating is the canvas for your culinary art. Before you even think about lighting or camera angles, consider how your food looks on the plate. Simplicity often reigns supreme. Avoid overcrowding the plate; instead, let your hero ingredient shine. Think about balance: distribute colors, textures, and shapes harmoniously.
Focus on contrast – a light sauce on a dark ingredient, or a pop of vibrant green against a neutral background. Use odd numbers for food items (e.g., three scallops, five berries) as they tend to be more aesthetically pleasing. A deliberate swirl of sauce, a sprinkle of fresh herbs, or a dusting of powdered sugar can transform a dish from good to gourmet.
Illuminating Your Dishes: Lighting Essentials
Lighting is arguably the most crucial element in food photography. Natural light is almost always your best friend. Position your food near a window, but avoid direct sunlight, which can create harsh shadows and blown-out highlights. Instead, opt for diffused natural light, which provides a soft, even glow. You can achieve diffusion by hanging a sheer curtain over your window or using a dedicated diffuser panel.
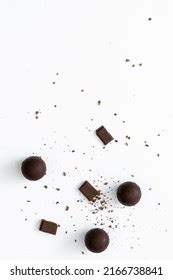
Experiment with light direction. Backlighting can highlight textures and create an enticing halo effect, especially for translucent foods or drinks. Side lighting adds depth and dimension, revealing the contours and details of your dish. Avoid using your camera’s built-in flash, as it typically produces flat, unflattering results.

Composition and Angles: Framing Your Feast
Once your dish is beautifully plated and perfectly lit, it’s time to compose your shot. The ‘rule of thirds’ is a classic compositional guideline: imagine your frame divided into nine equal sections by two horizontal and two vertical lines. Place your key elements along these lines or at their intersections for a more dynamic and engaging image.
Don’t be afraid of negative space; the empty areas around your food can draw attention to the main subject and create a sense of calm. Experiment with different camera angles. An overhead shot (flat lay) works wonderfully for showing off ingredients or complex arrangements, while a 45-degree angle mimics how a diner views their meal, giving a sense of height and texture. A close-up shot can emphasize appealing details like a melting cheese pull or a crispy crust.
Props and Backgrounds: Setting the Scene
While the food is the star, thoughtful props and backgrounds can enhance the narrative of your photo. Choose simple, non-distracting elements that complement your dish rather than compete with it. Rustic wooden boards, textured linens, vintage cutlery, or simple ceramic bowls can add character without overshadowing the food.
Keep your background simple and uncluttered. A plain wall, a wooden table, or even a large piece of poster board can work wonders. Pay attention to color harmony; choose props and backgrounds that either contrast gently or belong to the same color family as your food, creating a cohesive visual story.

A Touch of Post-Processing Magic
Even with perfect plating and lighting, a little post-processing can make your photos truly pop. Basic edits like adjusting brightness, contrast, white balance, and saturation can enhance the natural beauty of your food. Cropping can refine your composition, and sharpening can bring out fine details. Remember, the goal is to enhance, not to transform or distort, the food’s natural appeal. A subtle touch can make all the difference.
By mastering these essential tips on plating and lighting, along with thoughtful composition and prop selection, you’ll be well on your way to capturing stunning recipe photos that are as irresistible as the dishes themselves. Practice makes perfect, so keep experimenting and have fun documenting your culinary creations!


