


Best phone camera hacks for mouth-watering food bites without pro gear?

Ever scrolled through Instagram, drooling over beautifully captured food photos, and wondered how they achieved that professional look without a fancy DSLR? The good news is, you don’t need expensive equipment to turn your culinary creations into visual masterpieces. With a few smart phone camera hacks and a sprinkle of creativity, you can elevate your food photography from mundane to mouth-watering. Get ready to transform your visual bites into Instagram-worthy art!
Lighting is Your Best Friend
The single most crucial element in any photograph, especially food photography, is light. Forget artificial overhead lights or harsh direct sunlight; your best bet is natural, soft light. Position your food near a window, ideally on a cloudy day or during the “golden hour” (early morning or late afternoon) for a warm, diffused glow. Avoid direct harsh sunlight, which creates unflattering shadows and blown-out highlights. If your light source is too strong, use a thin white curtain or parchment paper to diffuse it. You can also use a white foam board or napkin as a reflector on the opposite side of your light source to bounce light back onto your food, filling in shadows.
Mastering Composition and Angles
Composition is how you arrange elements within your frame. For food, certain angles work wonders:
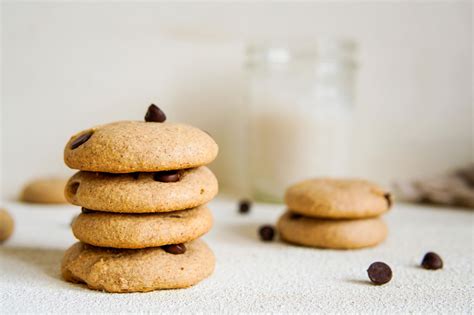
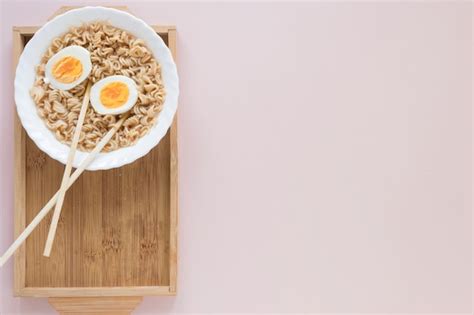
- The Overhead Shot (Flat Lay): Perfect for dishes with lots of texture and ingredients visible from above, like pizzas, charcuterie boards, or bowls of soup. Position your phone directly above the food, ensuring no shadows from your phone or body.
- The 45-Degree Angle: This is a versatile angle, mimicking how we naturally view a plate of food. It works well for dishes with some height, like burgers, sandwiches, or layered desserts, showing both the top and sides.
- The Straight-On Shot: Ideal for drinks, tall cakes, or dishes where the layers are key, like a stack of pancakes. Get down to eye level with your subject.
Remember the rule of thirds: imagine a 3×3 grid over your screen and place your main subject or points of interest along the lines or at their intersections for a more dynamic and engaging shot. Don’t be afraid to get close to highlight textures and details!
Dish Styling: Make It Pop!
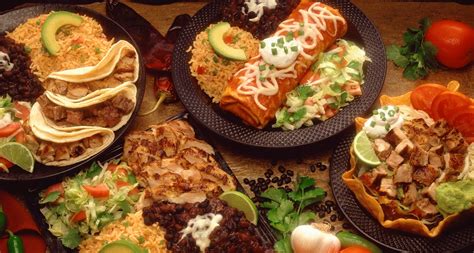
A beautifully cooked dish still needs a little help to shine on camera. Think about plating: use clean, simple dishes that don’t distract from the food. Add garnishes like fresh herbs, a sprinkle of spices, or a drizzle of sauce to enhance appeal and color. Small props like rustic cutlery, a linen napkin, or a complementary ingredient (e.g., lemons next to a fish dish) can add context and visual interest without overwhelming the main subject. Keep the background uncluttered – a simple wooden table, a plain tablecloth, or a solid-colored cutting board works best.
Post-Processing Power: Editing on Your Phone
Even the best shot can benefit from a little polish. Your phone’s built-in editing tools or free apps like Snapseed, Lightroom Mobile, or VSCO can make a huge difference. Focus on these key adjustments:
- Brightness & Contrast: To make your food pop and details clearer.
- Saturation & Vibrance: Boost colors subtly, but avoid over-saturating which can make food look unnatural.
- Sharpness: To enhance details, but use sparingly to avoid graininess.
- White Balance: Adjust to ensure colors are accurate and appetizing (e.g., warm up a cool-toned photo).
- Cropping & Straightening: Refine your composition and correct any crooked lines.
Experiment with different edits, but always aim for a natural, appetizing look.
Harnessing Your Phone’s Advanced Features
Many modern smartphones come equipped with features that can significantly up your food photography game:
- Portrait Mode: Creates a beautiful shallow depth of field (bokeh effect), blurring the background and making your food stand out.
- Tap to Focus & Exposure Lock: Tap on the most important part of your food to ensure it’s in sharp focus. Hold down your finger to lock the focus and exposure, allowing you to reframe slightly without losing your settings.
- Gridlines: Enable gridlines in your camera settings to easily apply the rule of thirds.
- Burst Mode: Useful for capturing dynamic shots, like a drizzle of sauce or a sprinkle of powdered sugar.
Don’t just point and shoot; explore your camera app’s settings and features to unlock its full potential.

Practice Makes Perfect
Like any skill, food photography takes practice. Don’t get discouraged if your first few attempts aren’t perfect. Experiment with different lighting conditions, angles, props, and editing styles. Look for inspiration from food bloggers and photographers, but always strive to develop your own unique style. The more you shoot, the better you’ll become at recognizing what works and what doesn’t. Soon, you’ll be snapping envy-inducing food photos that truly do justice to your delicious dishes, all without needing a single piece of “pro gear.”


