Best low-light photo tips for capturing incredible food adventures?

Embarking on a food adventure often means indulging in dimly lit bistros, cozy cafes, or vibrant night markets. While these settings create an incredible ambiance, they can be a photographer’s nightmare. Fret not! With a few clever techniques and a bit of practice, you can transform challenging low-light scenarios into stunning photographic opportunities, doing justice to your incredible culinary discoveries.
Embrace the Available Light
The first rule of low-light photography is to find and make the most of whatever light sources are present. Look for natural light coming from a nearby window, even if it’s faint, or position your dish to utilize overhead restaurant lighting. Sometimes, the ambient glow from a table lamp or even a phone screen (from a friend, not yours taking the picture!) can act as a gentle fill light. Avoid using your camera’s built-in flash, as it often creates harsh shadows and washes out colors, making your food look unappetizing.
Experiment with angles. Sometimes, rotating your dish or changing your own position by a few inches can dramatically alter how the existing light falls, highlighting textures and colors more effectively. White napkins or menu cards can also be strategically placed to bounce light back onto your food, acting as impromptu reflectors.

Master Your Camera Settings (Even on a Phone)
Understanding basic camera settings is crucial, whether you’re using a DSLR, mirrorless camera, or a smartphone. In low light, your primary goal is to let in as much light as possible without introducing too much noise (graininess).
- ISO: Increase your ISO sensitivity. Start moderately (e.g., 400-800) and go higher only if necessary, as higher ISO increases noise. Many modern smartphones have excellent low-light modes that automatically adjust this.
- Aperture: Use a wider aperture (smaller f-number, like f/1.8 or f/2.8) to let in more light and create a beautiful, blurred background (bokeh), making your food pop.
- Shutter Speed: A slower shutter speed allows more light but increases the risk of blur from camera shake. Aim for the fastest possible shutter speed that still gives you enough light.
For smartphone users, explore your device’s ‘Pro’ or ‘Manual’ mode to adjust ISO and even shutter speed if available. Many newer phones also offer dedicated ‘Night Mode’ features that cleverly combine multiple exposures to produce brighter, clearer low-light images. Learn to use these to your advantage.

Composition is Key in Dim Settings
In low light, simplicity in composition often works best. Focus tightly on your main subject – the hero of your dish. Eliminate clutter from the background that might distract from your food. Use the rule of thirds or leading lines to draw the viewer’s eye to the most appealing part of the plate.
Experiment with different angles. A top-down ‘flat lay’ can work well for dishes with interesting patterns or ingredients spread across the plate, while a 45-degree angle often highlights height and depth, perfect for burgers or stacked desserts. Get in close to capture intricate details and textures that might otherwise be lost in the dim lighting. The more compelling your composition, the less the low light will detract from the overall image.
Stabilization is Your Best Friend
When working with slower shutter speeds to capture more light, camera shake becomes a major enemy. Even the slightest movement can result in a blurry image. Stability is paramount.
- Tripod/Monopod: The ideal solution for serious photographers, allowing for very slow shutter speeds.
- Improvised Stands: If a tripod isn’t an option, use what’s around you. Rest your camera or phone on the table, a stack of books, or even a water bottle to keep it steady.
- Elbows In: When hand-holding, brace your elbows against your body, a table, or even a wall to minimize movement.
- Timer/Remote Shutter: Use your camera’s self-timer (2-second delay) or a remote shutter release to avoid any camera shake from pressing the shutter button.

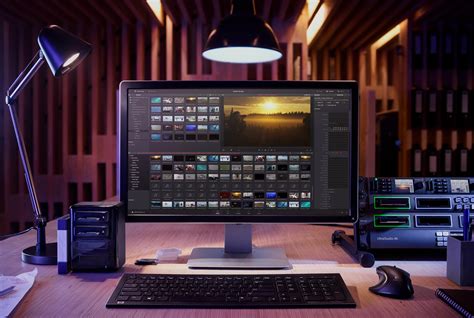
Post-Processing for Perfection
Low-light photos almost always benefit from a touch of post-processing. Even slight adjustments can dramatically improve your images.
- Exposure: Gently increase the exposure to brighten the overall image. Be careful not to overdo it, as this can introduce more noise.
- Contrast: Boost the contrast slightly to give your food more pop and depth.
- White Balance: Adjust the white balance to correct any color casts (e.g., a warm orange tint from incandescent lights) and make colors look more natural and appetizing.
- Sharpening & Noise Reduction: Apply a small amount of sharpening to bring out details, and use noise reduction tools sparingly to smooth out any graininess without losing too much detail.
Many free and paid apps (e.g., Adobe Lightroom Mobile, Snapseed, VSCO) offer powerful editing capabilities right on your phone, making it easy to fine-tune your shots on the go.
Conclusion
Capturing incredible food photos in low-light conditions is a skill that improves with practice. Don’t be afraid to experiment with different settings, angles, and light sources. Your food adventures deserve to be documented beautifully, no matter the lighting challenge. So, next time you’re in a dimly lit restaurant with a plate of culinary delight in front of you, remember these tips and capture those incredible moments!