How do real foodies keep fresh herbs vibrant for weeks? Visual storage tips!

The Secret Life of Your Fresh Herbs
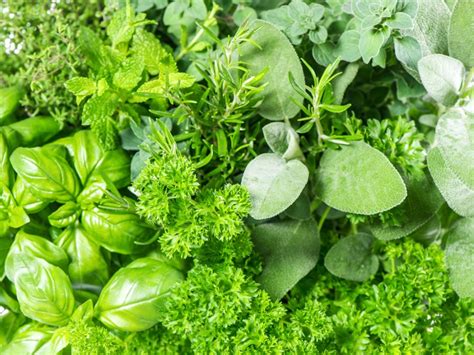
There’s nothing quite like the burst of fresh flavor that herbs add to a dish. But for many home cooks, keeping those delicate green sprigs vibrant for more than a few days feels like a losing battle. Wilting leaves and browning stems often lead to wasted ingredients and missed culinary opportunities. However, real foodies and seasoned chefs have mastered the art of herb preservation, extending their freshness for weeks with simple, visual techniques. Let’s dive into their tried-and-true methods.
Method 1: The Water Jar Oasis (Soft Herbs)
This classic method is perfect for soft, leafy herbs like parsley, cilantro, basil, mint, and dill. Think of it as putting your herbs in a tiny vase. First, trim about an inch off the bottom of the stems. Remove any leaves that would fall below the waterline to prevent spoilage. Place the herbs stem-down in a glass jar or container with about an inch of fresh water. For basil, leave it on the counter; for others, loosely cover the top with a plastic bag and refrigerate.

Change the water every day or two, and your herbs can stay fresh and perky for up to two weeks, sometimes even longer.
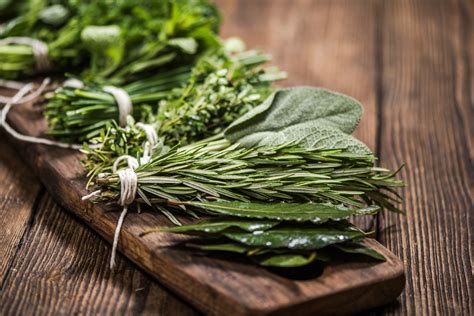
Method 2: Paper Towel Embrace (Hardier Herbs)
Hardier herbs such as rosemary, thyme, oregano, and sage thrive with a different approach. These herbs don’t do well sitting directly in water in the fridge, as excess moisture can lead to mold. Instead, gently rinse your herbs and pat them dry thoroughly. Lay them in a single layer on a slightly damp (not wet!) paper towel. Roll them up gently, creating a snug bundle.
Place the rolled herbs into a resealable plastic bag or an airtight container. Store this in the crisper drawer of your refrigerator. This method creates a humid, protective environment that can keep these herbs fresh for 2-3 weeks.
Method 3: Ice Cube Tray Immersion (Freezing)
When you have an abundance of herbs or simply want to prep for future cooking, freezing is an excellent option. Finely chop your desired herbs – parsley, cilantro, basil, and chives work particularly well here. Pack the chopped herbs into ice cube trays, filling each compartment about two-thirds full.
Pour olive oil (or even water) over the herbs until they are submerged. Freeze until solid, then pop out the herb cubes and transfer them to a freezer-safe bag. Label with the herb name and date. When cooking, simply drop a cube directly into soups, stews, sauces, or pan-fried dishes – no thawing needed!
Method 4: The Art of Air Drying
For a traditional approach, especially suited for robust herbs like rosemary, thyme, oregano, and sage, air drying is a beautiful and effective method. Gather small bundles of your chosen herbs and tie them securely at the stems with kitchen twine. Hang these bundles upside down in a warm, dry, well-ventilated area away from direct sunlight.
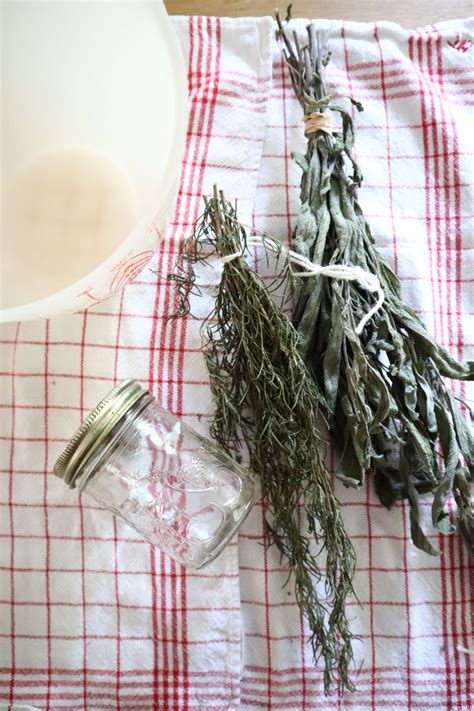
Depending on the herb and humidity, drying can take anywhere from one to three weeks. Once the herbs are brittle and easily crumble, remove the leaves from the stems and store them in airtight containers in a cool, dark place. They’ll retain their flavor for months.
Key Visual Tips for Maximizing Longevity
- Inspect and Trim: Always visually inspect your herbs upon arrival. Remove any damaged, yellowed, or browned leaves before storage. Trim the very ends of the stems for better water absorption, especially for the water jar method.
- Avoid Washing Until Use: Unless you’re immediately drying them, avoid washing herbs until right before you’re ready to cook with them. Excess moisture encourages rot.
- Choose the Right Container: Visual clarity is key. Glass jars, clear plastic bags, and transparent containers help you easily monitor the herbs’ condition without constantly opening them.
By implementing these simple yet effective visual storage tips, you’ll not only save money by reducing food waste but also elevate your culinary creations with the vibrant, fresh flavors of perfectly preserved herbs. Happy cooking!