


Secrets to styling homemade dishes for mouthwatering, share-worthy photos?

Why Visual Appeal Matters for Homemade Dishes
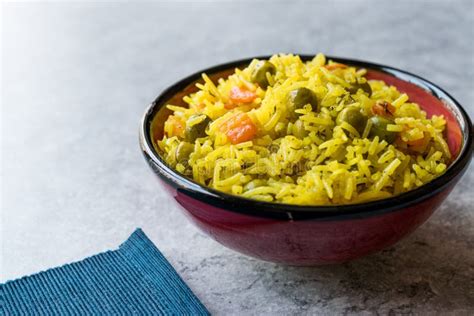
In today’s visually-driven world, a dish isn’t truly complete until it’s been beautifully captured and shared. Whether you’re a home cook sharing your culinary triumphs with friends and family, or an aspiring food blogger building your online presence, mastering the art of food styling can elevate your homemade creations from delicious to absolutely drool-worthy. It’s not just about taste; it’s about telling a story, enticing the viewer, and making them wish they could reach through the screen for a bite. Luckily, you don’t need expensive equipment or a professional studio to achieve stunning results. With a few simple techniques, you can turn your everyday meals into mouthwatering, share-worthy masterpieces.
Start with Fresh, Vibrant Ingredients
The foundation of any great food photo is the food itself. Always begin with the freshest, most vibrant ingredients you can find. Bruised herbs, wilting greens, or dull-looking vegetables will be difficult to make appealing, no matter how skilled you are with a camera. Before cooking, set aside a few pristine pieces of key ingredients – a sprig of fresh basil, a perfectly sliced chili, or a scattering of toasted nuts – to use as garnishes. These small details add a pop of color, texture, and a sense of freshness that instantly upgrades your dish’s visual appeal.
The Art of Thoughtful Plating
Plating is where the magic truly begins. Think of your plate as a canvas and your food as the paint. Avoid overcrowding; less is often more. Start with a clean, unblemished plate that complements your food – often, a neutral color like white or off-white works best to let the food shine. Consider the ‘rule of thirds’ from photography: don’t just dump food in the center. Place your main components slightly off-center, creating visual interest. Build height and texture where appropriate, for example, stacking pancakes or layering components in a salad. Use drizzles of sauce or olive oil strategically to create lines and patterns, but ensure they don’t look messy.
Mastering Natural Light
Lighting is arguably the most crucial element in food photography. The best light source for homemade dishes is almost always natural light, preferably from a window. Avoid harsh, direct sunlight as it creates unflattering shadows and blown-out highlights. Instead, position your dish near a window on a cloudy day, or use a sheer curtain to diffuse direct sun. Side lighting or backlighting can create beautiful shadows and highlights that add depth and dimension to your food. Never use your camera’s built-in flash; it flattens the image and gives an unappetizing glare.
Strategic Use of Props and Backgrounds
Props and backgrounds help set the scene and tell your dish’s story, but they should never overshadow the food. Keep backgrounds simple and uncluttered – a rustic wooden table, a plain white countertop, or a simple linen napkin can work wonders. Choose props that are relevant to the dish and complement its colors and textures. Think about what you’d typically use when eating or preparing the dish: a vintage fork, a colorful tea towel, a small bowl of accompanying sauce, or even a cookbook lying open. Remember, every element in the frame should contribute to the overall aesthetic without distracting from your delicious creation.
Experiment with Angles and Composition
Different dishes look best from different angles. A flat dish like a pizza or a beautifully arranged salad might shine in an overhead (flat lay) shot, showcasing all its components. Dishes with height, such as a towering burger or layered cake, often benefit from a 45-degree angle or even a straight-on shot to emphasize their structure. Don’t be afraid to get close to capture intricate details or textures. Pay attention to the composition – use leading lines, create negative space, and ensure your focal point (the most appealing part of your dish) is sharp and clear.

Finishing Touches and Post-Processing
Once you’ve captured your photos, a little post-processing can go a long way. You don’t need complex software; most smartphone editing apps or simple desktop programs offer basic adjustments. Focus on enhancing what’s already there: adjust brightness and contrast to make colors pop, slightly increase saturation to bring out vibrancy, and sharpen the image a touch to define details. Be careful not to overdo it – the goal is to enhance, not to create an artificial look. A subtle vignette can sometimes draw the eye towards the center of your dish.

Practice Makes Perfect
Styling and photographing food is a skill that develops with practice. Don’t get discouraged if your first attempts aren’t perfect. Experiment with different angles, lighting conditions, props, and plating techniques. Pay attention to what works well for other food photographers you admire and try to emulate their styles, then develop your own. Most importantly, have fun with it! The joy of cooking and sharing delicious, beautiful food is what it’s all about. With these secrets in your toolkit, you’re well on your way to creating stunning, share-worthy photos of your homemade culinary delights.


