


Best light for home-shot food Visual Bites to boost foodie engagement?
Illuminating Your Culinary Creations: The Power of Perfect Lighting
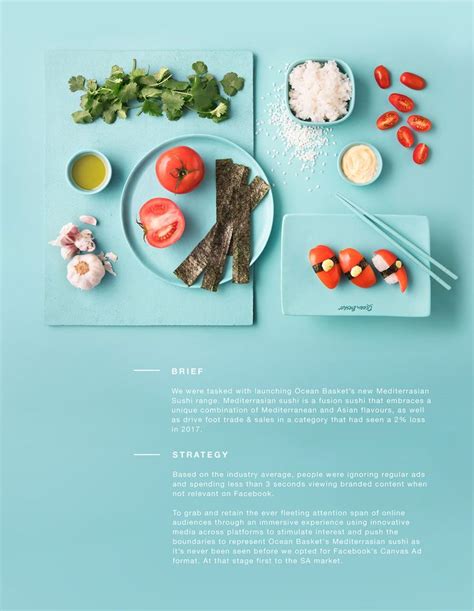
In the vibrant world of food blogging and social media, a mouth-watering dish isn’t enough; it needs to be seen. High-quality, engaging food photography, often termed ‘Visual Bites,’ is the secret sauce to capturing attention and boosting foodie engagement. And at the heart of every great food photo? Lighting. Whether you’re a seasoned home cook or an aspiring food influencer, understanding how to harness the best light for your home-shot culinary masterpieces can transform your content from bland to brilliant.
Poor lighting can make even the most delicious meal look unappetizing, while good lighting accentuates textures, colors, and the overall appeal of your dish. It tells a story, evokes emotion, and most importantly, makes your audience want to take a bite. Let’s delve into how to master this crucial element right in your own kitchen.
Harnessing the Magic of Natural Light
For most home-based food photographers, natural light is your best friend. It’s free, readily available (during the day), and provides a soft, diffused glow that beautifully highlights food without harsh shadows. The key is knowing how to use it effectively.
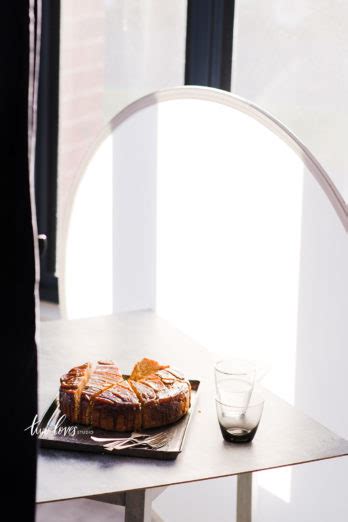
- Window Light: Position your food near a large window, ideally one that doesn’t receive direct, harsh sunlight. A north-facing window often provides the most consistent, soft light throughout the day.
- Diffusion: If the light is too bright or creating strong shadows, diffuse it. A sheer white curtain, a thin white sheet, or a professional diffuser placed between the window and your food will soften the light and create a more even spread.
- Reflectors: Use a white foam board, a piece of white cardstock, or even aluminum foil (crinkled then flattened for softer reflection) on the opposite side of your light source to bounce light back onto your dish. This fills in shadows and adds a lovely glow, making your food appear more three-dimensional.
When Natural Light Isn’t Enough: Artificial Solutions
Sometimes, natural light isn’t an option – think evening shots, cloudy days, or kitchens with minimal windows. This is where artificial lighting steps in. Modern LED lighting has made artificial setups affordable and user-friendly for home use.
- LED Panels: Dimmable LED panels with adjustable color temperatures offer immense control. Position them to mimic natural window light, typically to the side or slightly behind your food.
- Ring Lights: While popular for vlogging, smaller ring lights can also be effective for overhead shots or filling in light, providing an even, soft illumination.
- Softboxes: These attachments for studio lights (or sometimes built into LED panels) create a large, diffused light source, similar to a cloudy window. They are excellent for achieving professional-looking softness.
- Color Temperature Control: Look for lights that allow you to adjust the Kelvin (K) temperature. Aim for around 5500K for a daylight-like appearance, or slightly warmer (3000-4000K) for a cozy, inviting feel.
Pro Tips for Lighting Success
Beyond choosing your light source, how you position and manipulate it makes all the difference:
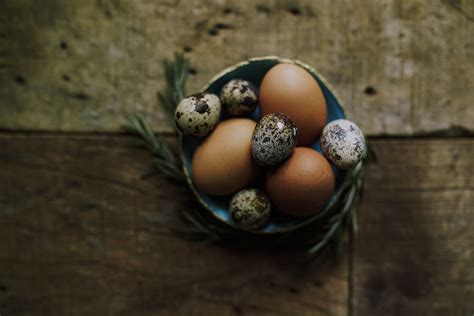
- Angle is Everything: Side lighting (from the left or right) or backlighting (from behind the food) are generally most flattering for food. They create depth, highlight textures, and add a beautiful rim light. Avoid direct front lighting, which can flatten your image.
- Embrace Shadows (Wisely): Shadows aren’t always bad! Thoughtfully placed shadows can add drama, mood, and dimension to your photos. Experiment with how shadows fall on your dish and props.
- White Balance: Ensure your camera’s white balance is correctly set for your light source. This prevents your food from looking too yellow (warm) or too blue (cool), ensuring true-to-life colors.
- Stability: Use a tripod whenever possible. This allows for longer exposures in dimmer light without blur and ensures consistent framing while you adjust your lighting setup.
Beyond the Light: Composition and Storytelling
While lighting is paramount, remember it’s one piece of the puzzle. Combine excellent lighting with thoughtful composition, appealing props, and a compelling narrative to truly elevate your Visual Bites. Consider the background, foreground, and negative space. Does the scene tell a story about the dish or the cooking process? Are the colors harmonious?
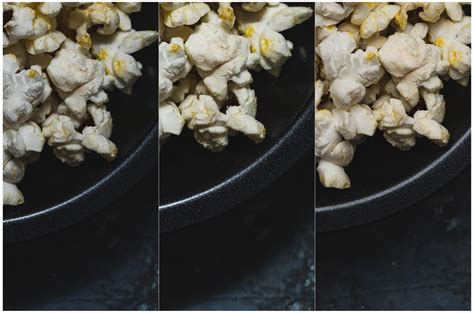
Practice is key. Experiment with different light sources, angles, and setups in your home. Take multiple shots, review them critically, and learn what works best for your specific dishes and aesthetic. The more you practice, the more intuitive lighting will become, allowing you to consistently create stunning food photos that captivate your audience.
Conclusion: Shine a Light on Your Culinary Talent
Mastering the best light for your home-shot food is an invaluable skill for any foodie looking to boost engagement. Whether it’s the soft kiss of natural window light or the controlled glow of an LED panel, understanding and utilizing proper illumination can transform your Visual Bites from simple snaps into works of art. Invest time in learning these techniques, and watch as your audience’s appetite for your content grows!


