Best lighting for appealing Visual Bites that drive recipe clicks?
The Crucial Role of Lighting in Driving Recipe Clicks
In the fast-paced world of digital food content, ‘Visual Bites’ – those tantalizing snippets of food photography or short videos designed to grab attention – are your primary tool for engaging audiences and encouraging them to explore your recipes. While the recipe itself is key, it’s the visual appeal that first captures the eye. And at the heart of every captivating food photo or video lies superior lighting. The right lighting can transform a simple dish into an irresistible masterpiece, making it appear more delicious, textured, and desirable, ultimately driving those all-important recipe clicks.
Understanding and mastering lighting techniques is not just a skill for professional food photographers; it’s an essential element for anyone looking to create compelling food content that stands out in a crowded feed. From highlighting the crispiness of a crust to showcasing the glistening sauce, proper illumination dictates how your food is perceived.
Harnessing the Power of Natural Light
Natural light is often hailed as the gold standard for food photography, and for good reason. It’s soft, diffused, and incredibly flattering, making food look fresh and inviting. The best natural light source is typically a large window, ideally facing north or south to avoid direct, harsh sunlight. Place your food setup near the window, but never directly in bright sun, which creates harsh shadows and overexposed highlights.
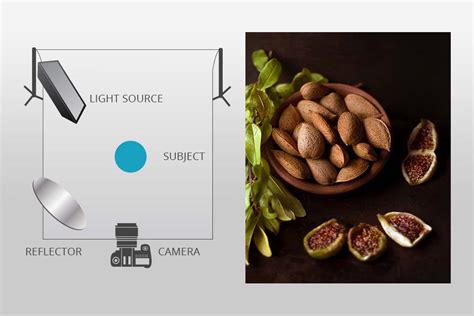
To further refine natural light, use diffusers (like sheer curtains or a white translucent sheet) to soften it even more, reducing harshness and creating a gentle, even glow. Reflectors (white foam boards, silver cards) are equally important for bouncing light back into the shadows, brightening up darker areas of your dish and adding dimension without creating new light sources.

Mastering Artificial Lighting for Consistency and Control
While natural light is beautiful, it’s not always available or consistent. This is where artificial lighting becomes invaluable. Modern LED panels, continuous lights with softboxes, or even speedlights can replicate the softness of natural light while offering complete control over intensity, direction, and color temperature. The key to successful artificial lighting for food is diffusion. Always use a softbox or a large diffuser to spread the light evenly and prevent harsh shadows.
When using artificial lights, position them similar to how you would natural light – often to the side or slightly behind your subject. This creates depth and highlights textures beautifully. Experiment with different light modifiers like grids to control light spill or reflectors to fill in shadows. The advantage of artificial light is its consistency, allowing you to shoot at any time of day or night and achieve repeatable results, which is excellent for brand consistency in your Visual Bites.

Understanding Light Direction and Quality
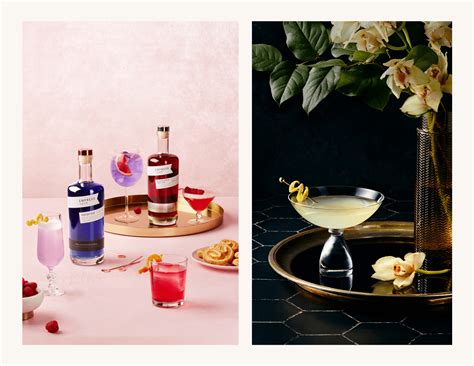
The direction of your light source dramatically impacts the mood and appearance of your food. Sidelighting (light coming from the side) is popular because it accentuates texture and creates appealing shadows, giving food a three-dimensional quality. Backlighting (light coming from behind the food) is fantastic for dramatic shots, making liquids glow and edges shine, often used for drinks or dishes with steam. Avoid direct front lighting as it tends to flatten your subject, robbing it of depth and visual interest.
Beyond direction, consider the quality of light – hard versus soft. Soft light, achieved through large light sources and diffusers, creates gentle, graduated shadows and is generally more forgiving and flattering for food. Hard light, from small or undiffused sources, produces sharp, distinct shadows and can be used for dramatic effect but requires careful handling. For most Visual Bites aiming to drive clicks, a soft, diffused light is usually the safest and most appealing choice.
Elevating Your Visual Bites for Maximum Engagement
Ultimately, the best lighting for your Visual Bites is the one that makes your food look its absolute best, inviting viewers to stop scrolling and click on your recipe. Whether you opt for natural or artificial light, focus on creating softness, highlighting key textures, and generating depth. Pay attention to your white balance to ensure colors are accurate and appealing. Don’t be afraid to experiment with different setups, angles, and light modifiers.
Remember, every recipe click starts with a visual impression. By mastering the art of lighting, you’re not just taking a photo; you’re crafting an experience, tantalizing taste buds, and building an irresistible bridge from your stunning Visual Bite directly to your delicious recipe. Invest time in perfecting your lighting, and watch your engagement soar.