


Elevate recipe plating: Pro visual tips for stunning foodie photos?

In the digital age, a delicious recipe isn’t just about taste; it’s also about visual appeal. With platforms like Instagram and Pinterest dominating the culinary scene, knowing how to plate your food like a pro can elevate your home cooking into a work of art and garner serious attention for your foodie photos. It’s an essential skill for any aspiring food blogger, home chef, or content creator.
The Foundation: Understanding Your Canvas
Before you even begin arranging food, consider your plate. The right plate serves as the perfect canvas, influencing the entire composition. Opt for simple, neutral-colored plates (white, grey, black) as they allow the vibrant colors of your food to stand out. Avoid overly ornate patterns that distract from the dish. The size of the plate is also crucial; leave ample negative space around your food to create a sense of elegance and highlight your focal point.
Think about the overall aesthetic. A rustic dish might suit a ceramic or wooden board, while a fine dining creation demands a pristine white china plate. The goal is to let the food be the star.
Mastering Composition and Arrangement
Plating isn’t just about dumping food on a plate; it’s about thoughtful arrangement. Start by establishing a focal point – the most visually interesting part of your dish. Build around this element. Using the ‘Rule of Thirds’ from photography can be incredibly helpful: imagine dividing your plate into a 3×3 grid and placing key elements at the intersections.
Aim for asymmetry, which often looks more dynamic than perfect symmetry. Arrange elements in odd numbers (e.g., three scallops, five asparagus spears) for a more pleasing aesthetic. Consider the ‘story’ your plate tells. Is it a deconstructed dish? A neatly stacked tower? Each element should have a purpose.
Building Height and Dimension
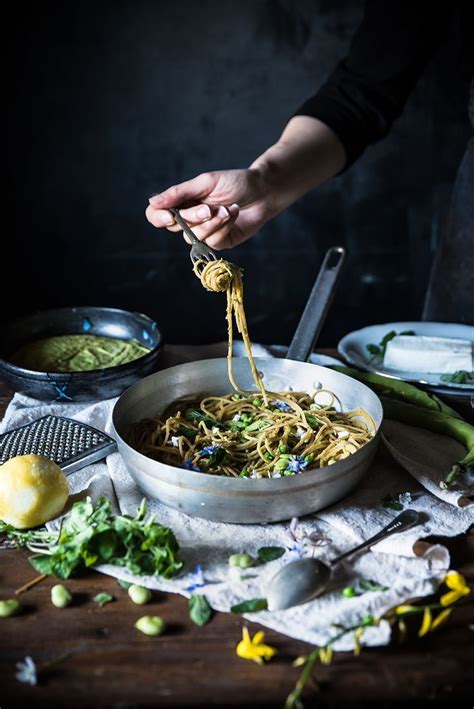
Flat food rarely looks appealing in photos. Create visual interest by adding height. This can be achieved by stacking ingredients (like a tower of pancakes), leaning elements against each other, or placing a main component atop a bed of grains or purée. Layering not only adds dimension but also allows diners to appreciate the different components of the dish. Use smaller, complementary ingredients to build upwards without making the dish seem overwhelming.

Color, Texture, and Contrast
A visually stunning dish is a feast for the eyes, utilizing a spectrum of colors and varying textures. Incorporate ingredients that offer contrasting colors – bright greens against a rich brown meat, or a vibrant red sauce on a creamy white pasta. Don’t be afraid to add a pop of unexpected color with an edible flower or a sprinkle of a colorful spice.
Texture is equally important. Think about different textural elements: crispy, creamy, crunchy, smooth. A dish with a variety of textures is more engaging both to eat and to photograph. For instance, pair a soft purée with some roasted, slightly charred vegetables, or add a sprinkle of toasted nuts for crunch.
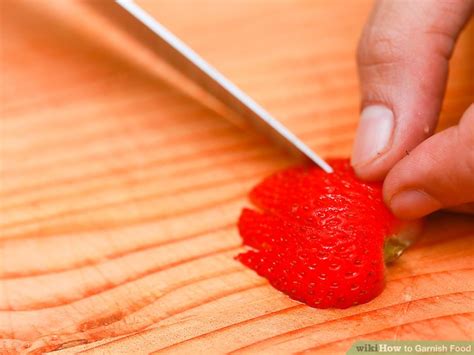
The Power of Garnishes and Sauces
Garnishes are not just an afterthought; they are the jewelry of your dish. A sprig of fresh herbs (parsley, cilantro, dill), a sprinkle of microgreens, a few edible flowers, or a lemon zest can add freshness, color, and a professional touch. Ensure your garnishes are relevant to the dish’s flavors and are fresh and vibrant.
Sauces can also be a game-changer. Instead of just pouring, try drizzling, creating swirls, or using a squeeze bottle to make precise dots or lines. A rich sauce can provide a beautiful backdrop or create an artistic pattern on the plate, adding depth and elegance to your food photos.
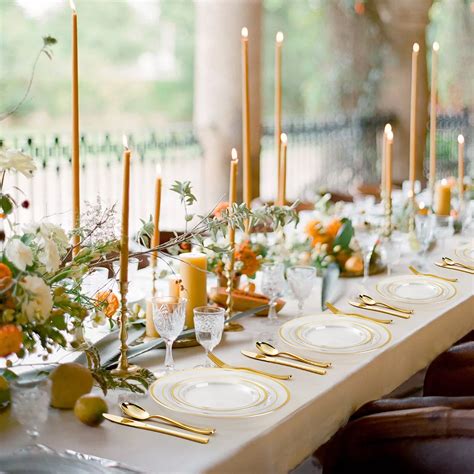
Beyond the Plate: Setting the Scene
While plating focuses on the food itself, the surrounding environment contributes significantly to your photo’s impact. Pay attention to your background – keep it clean, uncluttered, and complementary to your dish. Simple textures like wood, linen, or a plain wall work wonders. Props like elegant cutlery, a rustic napkin, or a small glass of water can add context without distracting from the main subject.
Finally, lighting is paramount. Natural light is almost always best for food photography. Position your plate near a window but out of direct sunlight. Soft, diffused light will highlight textures and colors beautifully, making your carefully plated dish truly shine in your foodie photos.
Final Touches and Practice
Before snapping that photo, do a quick check: wipe any smudges or drips from the plate rim, ensure no crumbs are out of place, and make sure all garnishes look their best. Remember that perfectly plated food often looks best immediately after plating, so be ready to shoot quickly.
Plating is an art that improves with practice. Don’t be afraid to experiment with different arrangements, colors, and textures. Take inspiration from professional chefs and food photographers, but always strive to develop your unique style. By applying these professional tips, you’ll not only enhance the dining experience but also create stunning foodie photos that captivate and inspire.


