Foodie’s best visual mise en place strategy for seamless, stunning meal prep?
For the passionate foodie, cooking is more than just sustenance; it’s an art form, a sensory experience, and a creative outlet. Yet, even the most enthusiastic home chef can find the grind of meal prep daunting. The secret to transforming this essential task into a seamless, stunning, and even enjoyable part of your culinary journey lies in mastering the art of visual mise en place. This isn’t just about chopping vegetables; it’s about orchestrating your kitchen like a symphony, where every ingredient is a perfectly tuned instrument, ready to play its part.
The Power of Visual Mise en Place: More Than Just Pretty Bowls
At its core, mise en place (French for “everything in its place”) is about preparation and organization before you even turn on the stove. Visual mise en place elevates this by emphasizing not just the readiness, but also the aesthetic appeal and logical arrangement of your ingredients. For a foodie, this means a clean, organized, and inspiring workspace that fuels creativity, minimizes stress, and often leads to more consistently delicious results. Imagine walking into a kitchen where all your ingredients are beautifully portioned, artfully arranged, and logically grouped – it transforms the act of cooking into a delightful performance rather than a frantic scramble.

Step 1: The Strategic Blueprint – Plan with Precision
Before any knife touches a cutting board, a successful visual mise en place begins with meticulous planning. This involves more than just picking a recipe; it’s about envisioning the entire cooking process. Start by planning your meals for the week, creating a detailed shopping list, and then breaking down each recipe into its core components. Consider the sequence of preparation: what can be prepped ahead? What needs to be fresh? This foundational step ensures you have every single ingredient on hand and a clear mental map of your culinary expedition.
- Menu Mapping: Plan your meals, snacks, and even daily drinks for the week.
- Ingredient Inventory: List every single item, down to a pinch of salt.
- Tools & Equipment: Identify all necessary knives, bowls, pans, and utensils.
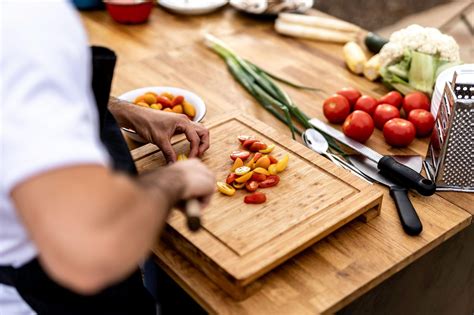
Step 2: Prep with Purpose – From Raw to Ready
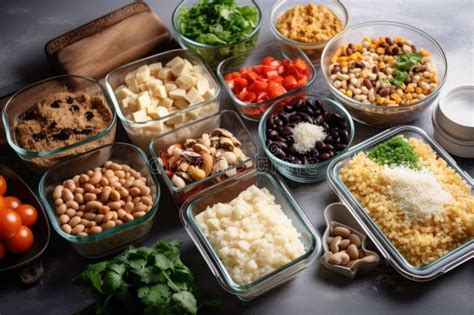
This is where the magic of transformation begins. Dedicate time to washing, peeling, chopping, dicing, mincing, and measuring every single ingredient. Think of this stage as building your culinary LEGO set, where each piece is perfectly formed and ready to be snapped into place. For visual appeal, aim for uniformity in your cuts where appropriate – consistent dice, even slices – as this not only looks better but also promotes even cooking. Measure all liquids and dry ingredients, portioning them into individual containers. This “raw to ready” phase is the backbone of efficiency.
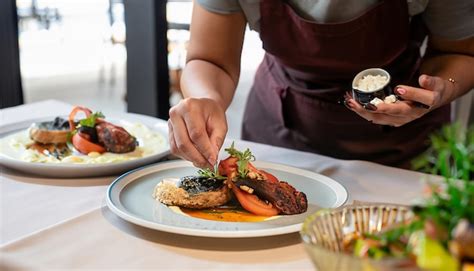
Step 3: The Art of Arrangement – Aesthetics Meets Efficiency
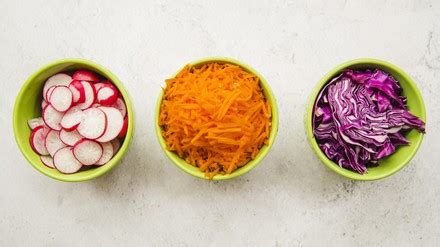
Once prepped, the arrangement of your ingredients is crucial for both visual appeal and workflow. This is where your foodie eye truly shines. Utilize a variety of containers – small bowls, ramekins, clear deli containers, or even baking trays – to hold your prepped items. Group ingredients logically: all aromatics together, all spices together, all components for a specific dish sectioned off. Consider color and texture when arranging them on your workspace; a visually appealing spread can be incredibly motivating. Clear containers are particularly useful as they allow you to see everything at a glance.
Step 4: Flow and Focus – The Seamless Workflow
A truly effective visual mise en place isn’t static; it dictates a dynamic, seamless workflow. Arrange your prepped ingredients around your cooking station in the order they will be used. Think left-to-right (or right-to-left, depending on your dominant hand and stove layout) for adding ingredients to the pan. Keep your waste bowl close by for scraps, and dedicate a space for dirty utensils. The goal is to move from prep to cooking with minimal hesitation, reducing decision fatigue and keeping your focus on the culinary task at hand. Clean as you go to maintain that pristine, inspiring environment.
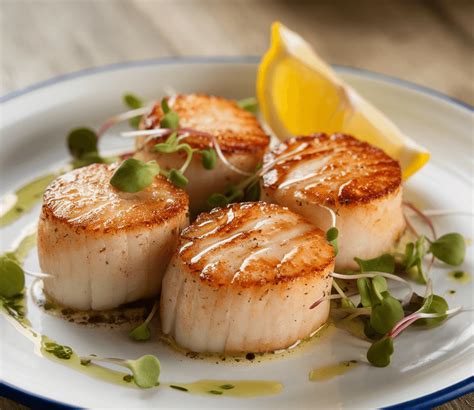
Step 5: Document Your Deliciousness – The Foodie Finish
For the foodie, a stunning mise en place is often a photo opportunity in itself. Before you dive into cooking, take a moment to appreciate (and perhaps photograph) your organized, vibrant spread. This act of appreciation reinforces the positive experience and can be a source of motivation for future meal prep sessions. Share your beautifully prepped ingredients online, inspiring others and celebrating your own culinary dedication. This visual documentation adds another layer of enjoyment to the entire process, turning a necessary chore into a shareable passion.
Beyond the Plate: Lasting Benefits
Implementing a visual mise en place strategy does more than just make your meal prep look good. It drastically reduces cooking time, minimizes stress, prevents forgotten ingredients, and encourages a more mindful approach to food preparation. It cultivates discipline, enhances creativity, and ultimately leads to a more consistent and enjoyable cooking experience. For the foodie, it transforms the kitchen into a personal studio, where every preparation is a step towards a masterpiece. Embrace this strategy, and watch your culinary journey become effortlessly stunning.