For Real Foodies, what Visual Bites editing tips ensure authentic, mouth-watering recipe visuals?

The Palate’s First Impression: Why Authentic Visuals Matter
For true foodies, the culinary experience begins long before the first bite. It starts with the visual journey, and in the digital age, that journey is often through stunning photography. But merely “stunning” isn’t enough; authenticity and a genuine mouth-watering appeal are paramount. Over-processed, artificial-looking food photos can be a major turn-off. So, how do you wield your editing tools to transform a raw photo into a visual feast that truly represents the dish?
Foundation First: The Unsung Heroes of Raw Footage
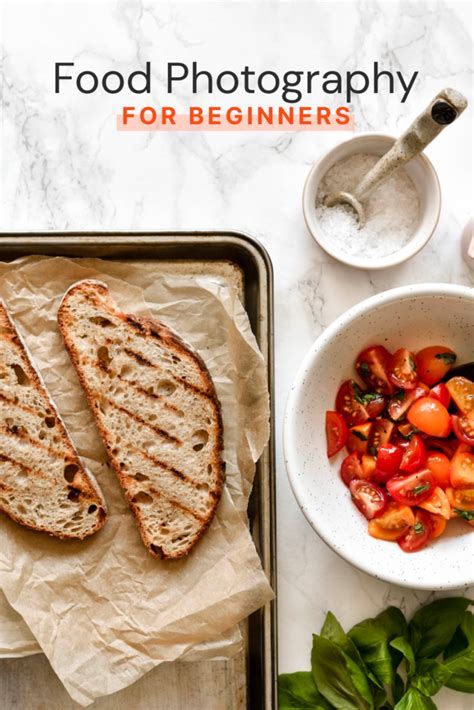
Before diving into editing, remember that a great edit starts with a great shot. Natural lighting is your best friend, illuminating textures and colors truthfully. Thoughtful composition guides the eye. Editing is about enhancing, not fixing fundamental flaws. With a solid base, your post-processing efforts will yield genuinely delectable results.

Mastering Color Correction and White Balance for True Hues
The cornerstone of authentic food photography editing is accurate color. Our eyes are highly attuned to color, and off-kilter tones can instantly make food look unappetizing. Start with white balance. A neutral white balance ensures that whites are white, not yellow or blue, setting the correct base for all other colors. Then, fine-tune individual color channels (HSL sliders) to make specific ingredients pop without distorting their natural shade. Think vibrant greens for herbs, rich reds for tomatoes, and golden browns for baked goods, all while maintaining realism.
Enhancing Texture and Detail: The Irresistible Imperfections
Food is tactile, and great visuals convey that. Sharpness and clarity tools are crucial here. Carefully increase sharpness to define edges and bring out intricate details—think the crispy skin of roasted chicken, the flaky layers of a pastry, or the glistening condensation on a cold drink. Be judicious; over-sharpening can introduce an unnatural, grainy look. Instead, use local adjustments or clarity sliders to subtly enhance textures, making them almost palpable on screen.

Strategic Saturation and Contrast: Finding the Sweet Spot
It’s tempting to crank up saturation, but this often leads to artificial-looking food. Instead, aim for strategic saturation. Use vibrance over saturation, as vibrance selectively boosts less-saturated colors, preventing skin tones (if hands are in the shot) or already vibrant colors from becoming garish. Contrast adds depth and dimension. A good balance of highlights and shadows makes food look three-dimensional and inviting, pulling the viewer into the scene without flattening the image or crushing details.
The Art of Selective Adjustments: Guiding the Gaze
Not every part of your photo needs the same treatment. Selective adjustments are powerful tools for food photographers. Use radial or graduated filters to brighten specific areas, draw attention to the hero ingredient, or deepen shadows around the edges to create a sense of mood and depth. Dodging and burning (lightening and darkening specific areas) can subtly enhance highlights on glazes or sauces and add richness to darker tones, mimicking how light naturally falls on a dish. This technique helps guide the viewer’s eye to the most appealing parts of the food.
Embracing Authenticity: When ‘Real’ Trumps ‘Perfect’
While editing is about enhancement, real foodies appreciate authenticity. Sometimes, a tiny crumb, a slight sizzle mark, or a natural spill tells a story of creation and deliciousness more effectively than an impeccably sterile image. Avoid over-smoothing textures or removing every single natural imperfection. The goal is to make the food look its absolute best, as food, not as a plastic prop. This subtle balance communicates trustworthiness and genuine culinary appeal.
![[100+] Authentic Pictures | Wallpapers.com](/images/aHR0cHM6Ly90czMubW0uYmluZy5uZXQvdGg/aWQ9T0lQLnkzTnlVYXMzbzlXWURqT3BpTkJIdVFIYUU4JnBpZD0xNS4x.webp)
Common Pitfalls to Avoid
- Over-editing: The most common mistake. Food should never look fluorescent or plastic.
- Inconsistent White Balance: Can make a dish look unappetizing or stale.
- Crushed Blacks/Blown Highlights: Losing detail in the darkest or brightest areas removes realism.
- Excessive Vignetting: Can look dated or distract from the food itself.
Conclusion: Crafting a Visual Feast with Integrity
For real foodies, a recipe’s visual presentation is an integral part of its allure. By focusing on accurate color, enhanced natural textures, strategic contrast, and selective adjustments, all while prioritizing authenticity, you can create images that don’t just look good, but truly taste good with the eyes. Remember, your editing goal is to tell the story of deliciousness, making every visual bite an irresistible invitation to the culinary experience.