How do real foodies keep fresh herbs vibrant & photo-ready for weeks?

The Culinary Dilemma: Keeping Herbs Alive and Gorgeous
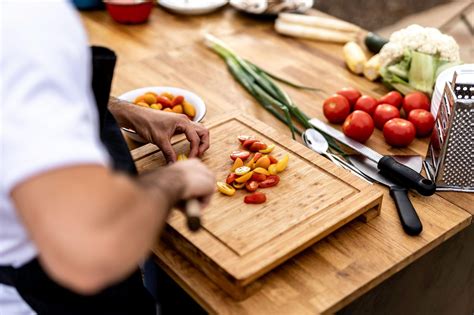
For any true foodie, fresh herbs are non-negotiable. They add a burst of flavor, vibrant color, and an aromatic flourish that elevates any dish from good to unforgettable. But the joy of a newly purchased bunch can quickly turn to dismay as delicate leaves wilt, brown, and lose their vitality within days. The challenge? Keeping them crisp, fragrant, and yes, even photo-ready, for weeks rather than days. Fear not, fellow culinary enthusiasts, for there are simple, effective strategies to extend the life of your precious greens.
General Principles for Herb Longevity
Before diving into specific methods, a few universal rules apply to nearly all fresh herbs. Starting with quality herbs is crucial – look for vibrant color, firm stems, and no signs of wilting or bruising. Upon bringing them home, avoid washing them until just before use, as excess moisture can encourage spoilage. Always trim the very ends of the stems, much like you would cut flowers, to open up the vascular system for better water absorption. And finally, inspect your bunch for any bruised or discolored leaves and remove them immediately to prevent them from affecting the rest.

Method 1: The Water Bath Technique (for Most Tender Herbs)
This method is a savior for many delicate, leafy herbs like parsley, cilantro, dill, and mint. It mimics how flowers are kept fresh in a vase.
- Trim and Submerge: Snip about half an inch off the bottom of the stems.
- Water Bath: Place the trimmed herbs upright in a glass jar or container with about an inch of fresh, cool water at the bottom. Ensure only the stems are in the water, not the leaves.
- Cover and Refrigerate: Loosely cover the herbs and the top of the jar with a plastic bag or plastic wrap to create a mini-greenhouse effect and prevent dehydration. Place the jar in the refrigerator.
- Change Water: Replace the water every 1-2 days to keep it fresh and prevent bacterial growth.
This technique can keep these herbs fresh and perky for up to two weeks, sometimes even longer.
Method 2: The Paper Towel Roll-Up (for Hardy & Some Tender Herbs)
Hardier herbs like rosemary, thyme, oregano, and chives, as well as some sturdier tender herbs, thrive with this moisture-controlled wrapping method. This is also excellent for kale and other leafy greens.
- Wash and Thoroughly Dry: This step is critical. Gently wash the herbs under cool water and then dry them completely using a salad spinner or by patting them very carefully with paper towels. Any excess moisture will lead to rot.
- Wrap Them Up: Lay the dry herbs on a slightly damp (not wet) paper towel. Roll them up snugly.
- Seal and Refrigerate: Place the wrapped herbs inside a resealable plastic bag or an airtight container. Store them in the crisper drawer of your refrigerator.
This method minimizes air exposure and maintains just the right amount of humidity, keeping hardy herbs fresh for 2-3 weeks.

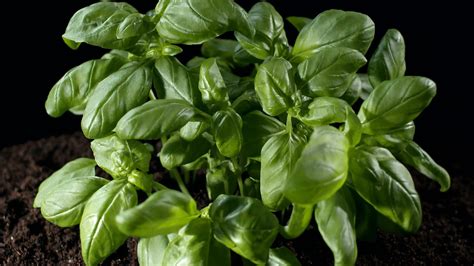
Basil: The Sensitive Star (A Special Case)
Basil is the prima donna of the herb world – it does not like the cold. Refrigeration can cause its delicate leaves to blacken and lose flavor. For basil, treat it like a cut flower:
- Room Temperature Water Bath: Trim the stems and place the bunch in a glass of water on your kitchen counter, away from direct sunlight.
- No Cover Needed: Unlike other tender herbs, basil prefers not to be covered with a plastic bag; it needs air circulation.
- Change Water: Replace the water daily.
Stored this way, basil can last for about a week, maintaining its vibrant green and pungent aroma. For longer storage, consider blanching and freezing.
Advanced Tips for Peak Vibrancy & Photo-Readiness
- Air Circulation: Ensure your stored herbs aren’t crammed tightly in the fridge, especially in sealed containers. A little breathing room helps.
- Regular Checks: Periodically check your stored herbs. Remove any leaves that start to show signs of spoilage immediately to prevent them from spreading mold or rot.
- Revive with Ice Water: If herbs look a little limp before use, a quick dip in a bowl of ice water for 5-10 minutes can often perk them right up, making them crisp and vibrant for that perfect plating.
- For the Camera: “Photo-ready” herbs mean more than just fresh; they mean bright color, firm texture, and no blemishes. Proper storage ensures these qualities are maintained, so when it’s time to garnish your masterpiece, your herbs are as visually appealing as they are delicious.

Elevate Your Culinary & Photography Game
No longer will you have to toss sad, wilted herbs or rush to the store for a fresh bunch. By implementing these simple yet effective storage techniques, you can ensure your fresh herbs remain vibrant, fragrant, and perfectly camera-ready for weeks on end. This not only reduces food waste but also empowers you to cook with confidence, knowing a garnish of bright green perfection is always at your fingertips. Experiment with these methods, find what works best for each herb in your kitchen, and watch as your culinary creations (and their photos!) reach new heights.