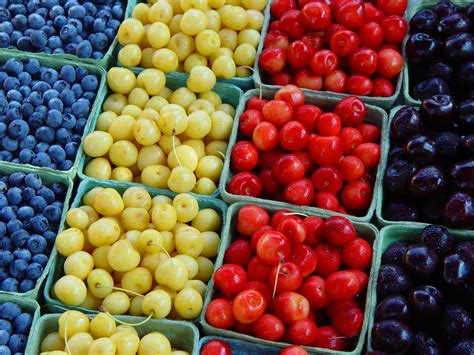
How do you organize your fridge for optimal fresh produce visibility & reduced waste?

Revolutionize Your Fridge: A Guide to Optimal Produce Storage
An organized refrigerator isn’t just aesthetically pleasing; it’s a powerful tool in the fight against food waste and a major step towards a more efficient and healthy kitchen. When your fresh produce is visible, easily accessible, and stored correctly, you’re far more likely to use it before it spoils. This guide will walk you through transforming your fridge into a produce-preserving powerhouse, ensuring every vibrant fruit and crisp vegetable gets its moment to shine.

Step 1: The Great Clean-Out and Inventory
Before you can organize, you must first purge and prepare. Empty your entire fridge. Dispose of anything expired, moldy, or unidentifiable. Wipe down all shelves, drawers, and walls with a mild, food-safe cleaner. This clean slate is crucial for both hygiene and a fresh start. As you put items back, take an inventory of what you have. This will help you plan your organization strategy and identify any recurring waste patterns.
Step 2: Understanding Temperature Zones & Strategic Placement
Your refrigerator isn’t uniformly cold. Different areas are designed for different types of food. Mastering these zones is key to extending the life of your produce:
- Top Shelf: This area tends to be slightly warmer and is ideal for ready-to-eat items like leftovers, deli meats, and prepped produce.
- Middle Shelves: Consistent and cool, perfect for dairy products, eggs, and cooked foods.
- Bottom Shelf (Coldest): This is the coldest part of your fridge. It’s best reserved for raw meats (stored in sealed containers to prevent drips) and highly perishable items that need maximum chill.
- Crisper Drawers: These are designed to control humidity. Utilize them wisely:
- High-humidity drawer: Best for leafy greens (spinach, lettuce, kale) and other moisture-loving vegetables (carrots, broccoli, cucumbers).
- Low-humidity drawer: Ideal for fruits and vegetables that produce ethylene gas, which can cause other produce to ripen faster (apples, pears, bell peppers, some citrus). Keep ethylene producers separate from ethylene-sensitive items like leafy greens.
- Door: The warmest part of the fridge, due to frequent opening. Best for condiments, sauces, and drinks. Avoid storing milk or eggs here if possible.

Step 3: Produce-Specific Storage Tactics
Beyond zones, specific produce items benefit from tailored storage:
- Leafy Greens: Wash, dry thoroughly (a salad spinner is invaluable), then wrap in a paper towel and store in an airtight container or a reusable produce bag in the high-humidity crisper.
- Berries: Do not wash until just before eating. Store in a single layer in a breathable container (like one with ventilation holes) to prevent mold, usually in the coldest part of the main compartment.
- Herbs: Treat like a bouquet of flowers. Trim the stems, place them in a small glass of water, cover loosely with a plastic bag, and place on a shelf.
- Root Vegetables (carrots, beets, radishes): Remove greens (they draw moisture from the roots), wash, dry, and store in a high-humidity crisper drawer.
- Apples & Pears: Store in the low-humidity crisper drawer, away from other produce if possible, due to their ethylene production.
- Avocados & Tomatoes: Ripen on the counter, then move to the fridge to extend their life once ripe.
Step 4: Smart Tools & Visibility Hacks
Investing in the right tools can dramatically improve visibility and organization:
- Clear Containers and Bins: See-through containers (glass or BPA-free plastic) are your best friend. They allow you to instantly see what’s inside, preventing forgotten items. Use rectangular bins to group similar items and maximize shelf space.
- Turntables (Lazy Susans): Excellent for corners or deeper shelves, making small jars and condiments easily accessible without rummaging.
- Labels: Label containers with contents and purchase dates, especially for prepped items or leftovers.
- Designate an “Eat Me First” Zone: Create a small bin or shelf for items that need to be consumed soonest, whether it’s leftover components from a meal, produce nearing its prime, or open packages. This visual cue encourages immediate use.
Step 5: Regular Maintenance is Key
Organization isn’t a one-time event; it’s an ongoing practice. Dedicate 5-10 minutes once a week (perhaps before your grocery run) to a quick fridge tidy-up. Check dates, rotate items (First In, First Out – FIFO principle), and move anything to the “Eat Me First” zone that’s approaching its limit. This habit prevents build-up and ensures your efforts pay off long-term.

The Payoff: Less Waste, More Flavor, Easier Living
By implementing these strategies, you’ll not only enjoy a beautifully organized fridge but also reap significant benefits: a dramatic reduction in food waste, saving you money; easier meal planning and preparation because ingredients are visible and fresh; and the satisfaction of knowing you’re making the most of every delicious piece of produce you bring home. Happy organizing!