


How to capture mouth-watering Visual Bites that compel foodies to try the recipe?
The Power of the Plate: Why Visuals Matter
In the digital age, a recipe’s first impression isn’t its ingredients list or instructions—it’s its visual appeal. Foodies scroll through endless feeds, and only the most captivating images stop them in their tracks. Learning how to transform a delicious dish into a mouth-watering visual bite is key to compelling someone not just to admire, but to try your recipe. This guide will walk you through the essential techniques to make your food photos truly irresistible.

Mastering Light: Your Secret Ingredient
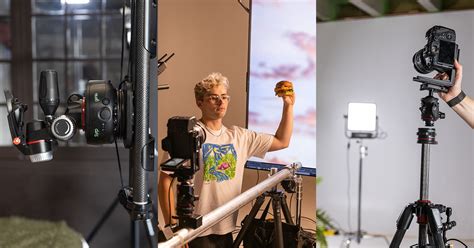
Light is perhaps the single most important element in food photography. It sets the mood, highlights textures, and brings your food to life. Natural light, specifically soft, diffused daylight, is your best friend. Position your food near a window, but avoid direct harsh sunlight which can create unflattering shadows and blown-out highlights. Use a diffuser (a sheer curtain, parchment paper, or even a white bedsheet) to soften the light if it’s too intense. This gentle illumination will make your dish look fresh, inviting, and utterly delectable.
Experiment with side lighting or backlighting to add depth and dimension. Side lighting beautifully emphasizes texture, while backlighting can create a gorgeous halo effect, especially on liquids or translucent ingredients. Always remember to use a reflector (a white foam board or even aluminum foil) on the opposite side to bounce light back and fill in any deep shadows, ensuring your food is evenly lit and appealing.
Styling for Success: Less is Often More
Great food photography isn’t just about snapping a picture; it’s about thoughtful styling. Before you even pick up your camera, consider the narrative you want to convey. Choose simple, complementary backgrounds and props that enhance the food without overwhelming it. Think about the colors and textures that will make your dish pop. A rustic wooden board, a clean linen napkin, or a ceramic bowl can add character without distracting from the star of the show.

Highlighting the Hero: Focus on Freshness and Texture
Ensure your food looks fresh and vibrant. Garnish with fresh herbs, a sprinkle of spices, or a drizzle of sauce just before shooting. These small details can make a huge difference, adding a touch of professionalism and inviting allure. Focus on highlighting the best aspects of the dish – the crispy skin, the gooey cheese, the perfectly risen crust. Use small portions to avoid overcrowding the plate, giving each ingredient room to breathe and shine.
Composition and Angles: Telling Your Story
The angle from which you shoot dramatically changes how your food is perceived. Three popular angles dominate food photography, each with its own strengths:
- Overhead (Flat Lay): Ideal for showing multiple components, intricate patterns, or when the top of the dish is the most appealing part (e.g., pizzas, elaborate salads, beautifully arranged spreads).
- 45-Degree Angle: Mimics how we naturally view our food when seated at a table. It’s versatile and works well for most dishes, offering a good balance of showing height and the top of the food.
- Eye-Level Angle: Perfect for dishes with impressive height or layers (e.g., burgers, cakes, stacks of pancakes). This angle creates a more intimate and engaging perspective.

Beyond the angle, consider composition. The rule of thirds is a classic guideline; imagine your frame divided into a 3×3 grid and place your main subject along these lines or at their intersections. Use leading lines to draw the viewer’s eye, and play with negative space to create a sense of calm and focus.
Post-Processing Perfection: The Final Polish
No food photo is truly complete without a touch of post-processing. Editing isn’t about altering reality but enhancing what’s already there. Adjust brightness, contrast, and saturation to make colors pop and details sharper. Correcting white balance is crucial to ensure your food’s colors are accurate and appealing. A slight boost in clarity can bring out textures, while a gentle vignette can draw the eye to the center of your dish.

There are many user-friendly apps and software available, even for smartphones, that can help you achieve professional-looking results. Remember to use these tools subtly; the goal is to make your food look its best, not artificial.
Conclusion: Inspire with Every Snap
Capturing mouth-watering visual bites is a skill that improves with practice. By paying attention to light, styling, composition, and post-processing, you can elevate your food photography from mere documentation to powerful visual storytelling. Each compelling image you create doesn’t just showcase a recipe; it sparks curiosity, ignites desire, and ultimately compels foodies to step into their own kitchens and experience the magic for themselves. So, grab your camera (or smartphone), embrace the light, and start inspiring!


