How to keep farmers market greens crisp & vibrant for foodie flatlays?

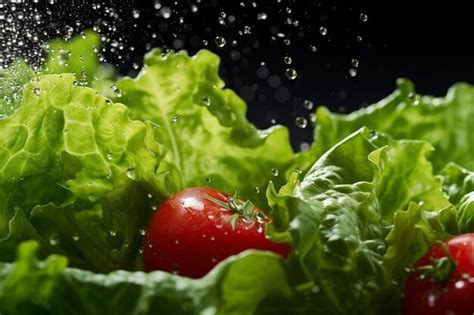
There’s nothing quite like the bounty of a farmers market – fresh, locally grown greens bursting with color and vitality. However, the joy can quickly fade when those beautiful leaves wilt within a day or two of getting them home. For home cooks and food bloggers alike, maintaining that crisp freshness is crucial, especially when aiming for those envy-inducing foodie flatlays. Fret not! With a few simple techniques, you can extend the life of your farmers market haul and keep your greens looking photoshoot-ready.
The Science Behind the Wilt: Understanding Your Greens
To master the art of preservation, it helps to understand why greens wilt. Fresh produce is mostly water, and as soon as it’s harvested, it begins to lose moisture through its leaves. This process, called transpiration, causes the plant cells to lose turgidity, leading to droopiness. Additionally, exposure to air, heat, and even ethylene gas (emitted by some fruits) can accelerate spoilage. Our goal, therefore, is to minimize moisture loss and create an optimal environment for storage.
Smart Shopping for Longevity
The journey to long-lasting greens begins at the market itself. Choose wisely:
- Inspect Carefully: Look for greens that are firm, vibrant in color, and free of yellowing, brown spots, or slime. Avoid any bunches that already look limp or damaged.
- Go Early: The freshest produce is often available early in the day before it’s been exposed to prolonged heat.
- Bring a Cooler Bag: Especially on warm days, transport your greens in an insulated bag with an ice pack to maintain their cool temperature on the way home.

At-Home Storage Techniques: The Essentials
Once you’re back from the market, it’s time to implement the magic:
1. Hold the Wash (Initially)
Unless your greens are visibly very dirty, avoid washing them immediately upon arrival. Excess moisture can encourage bacterial growth and speed up spoilage. Wash them right before you’re ready to eat or photograph them.
2. Dry, Dry, Dry (If Washing)
If you absolutely must wash your greens, or if you plan to prep them for immediate use, drying is paramount. Use a salad spinner to remove as much water as possible, then spread them out on clean kitchen towels or paper towels and gently pat them completely dry. Any residual moisture will lead to sliminess and quick decay.
3. The Paper Towel Method
This is arguably the most effective technique for most leafy greens. Wrap dry greens loosely in a clean, slightly damp (not wet!) paper towel or a clean kitchen towel. The towel absorbs excess moisture while still maintaining a humid environment, preventing the greens from drying out.
4. Airtight Containers are Your Friend
After wrapping your greens, place them in an airtight container or a reusable produce bag. This creates a barrier against oxygen exposure and helps maintain a consistent, cool temperature. Store the container in the crisper drawer of your refrigerator, which is designed to keep vegetables fresh.
Tailoring Storage to Your Greens
Different greens have slightly different needs:
Sturdy Greens (Kale, Collards, Chard)
These can be stored using the paper towel and airtight container method. Alternatively, you can trim the ends and place them upright in a glass of water, much like a bouquet of flowers, then loosely cover the leaves with a plastic bag before refrigerating. Change the water daily.
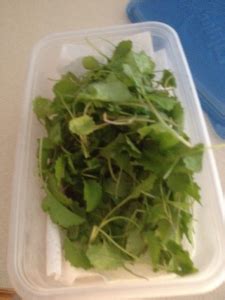
Tender Greens (Lettuce, Spinach, Arugula, Spring Mix)
The paper towel and airtight container method is ideal for these delicate varieties. For very delicate items like arugula, consider adding an extra dry paper towel to absorb more moisture.
Delicate Herbs (Cilantro, Parsley, Mint)
Similar to sturdy greens, these benefit from having their stems trimmed and placed in a glass of water, loosely covered with a plastic bag, and refrigerated. You can also wrap them in a slightly damp paper towel and store them in an airtight container.
Reviving & Refreshing: A Last Resort
If despite your best efforts, some greens become slightly wilted, don’t despair! You can often revive them with an ice bath. Submerge the greens in a bowl of ice water for 15-30 minutes. The cold water will help them rehydrate, bringing back some of their crispness. Pat them thoroughly dry before use.
Flawless Flatlays: The Final Touch
When it’s time for your foodie flatlay, give your greens a quick final rinse if needed, and pat them perfectly dry. Arrange them quickly, focusing on natural light and composition to highlight their vibrant colors. Remember, the crisper and more vibrant your greens are, the more appealing your photographs will be. A well-preserved bunch of farmers market greens not only tastes better but also looks infinitely more appetizing in your culinary creations and on your feed.

By following these simple yet effective storage techniques, you can extend the life and beauty of your farmers market greens, ensuring they remain crisp, flavorful, and camera-ready for all your kitchen adventures and foodie photography dreams.