How to make roasted vegetables vibrant and crisp, not soggy, for stunning foodie photos?
Unlock the Secret to Perfectly Roasted Vegetables
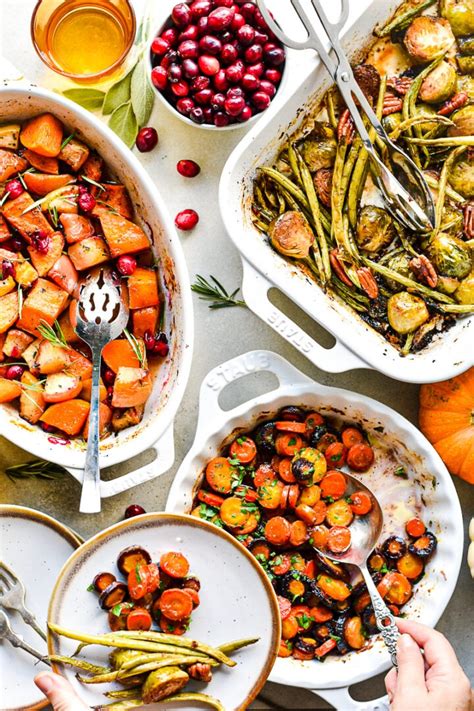
Transforming ordinary vegetables into culinary masterpieces that are both deliciously crisp and visually stunning for your foodie photos can seem like a challenge. Too often, home cooks find themselves with a pan of soggy, dull vegetables rather than the vibrant, caramelized bites they envisioned. Fear not! Achieving that coveted crisp exterior and brilliant color isn’t a mystical art, but rather a science rooted in a few crucial techniques. This guide will walk you through the essential steps to ensure your roasted vegetables are always photo-ready, bursting with flavor, and irresistibly crisp.

Preparation is Paramount: Dryness and Uniformity
The journey to crispy perfection begins long before your vegetables hit the oven. Moisture is the enemy of crispiness. After washing your vegetables, it is absolutely critical to dry them thoroughly. Use a salad spinner for leafy greens or a clean kitchen towel for heartier root vegetables. Pat them until they are as dry as possible. Any residual water will steam the vegetables instead of roasting them, leading to a flabby texture.
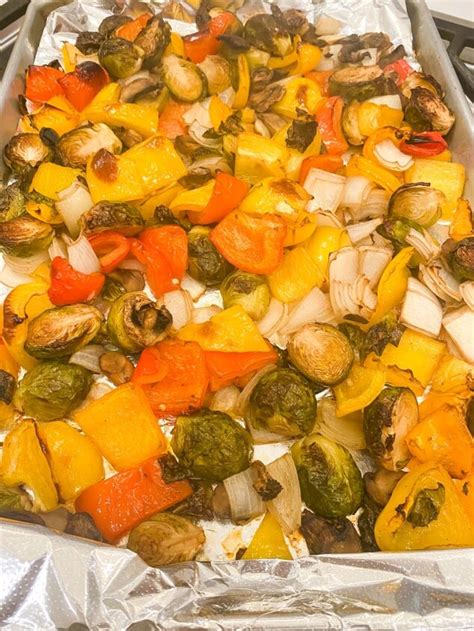
Equally important is cutting your vegetables into uniform sizes. Inconsistent cuts mean some pieces will burn while others remain undercooked or soggy. Aim for pieces that are roughly the same thickness and surface area to ensure even cooking and browning. This attention to detail will significantly impact both the texture and the visual appeal of your final dish.
The Right Amount of Oil and Seasoning
Oil is your friend, but moderation is key. Too little oil and your vegetables will stick and potentially burn; too much, and they’ll become greasy and soggy. A light, even coating is what you’re after. Opt for oils with a high smoke point, like avocado oil, grapeseed oil, or a good quality olive oil. Toss the vegetables in a large bowl with the oil, ensuring every piece is lightly coated. Don’t drench them!
Seasoning should be generous but mindful. Salt draws out moisture, which is good in controlled amounts, but can make vegetables watery if added too early or in excess before roasting. Add salt, freshly ground black pepper, and any other desired herbs or spices (like paprika, garlic powder, or dried thyme) just before spreading them on the baking sheet.
Give Them Space: The Uncrowded Pan Rule
This is arguably one of the most vital rules for crispy roasted vegetables. Overcrowding your baking sheet is a common mistake that guarantees sogginess. When vegetables are packed too tightly, they release steam, which gets trapped and essentially steams the vegetables instead of allowing them to roast and caramelize. Think of it as giving each vegetable its own personal space bubble.
Use multiple baking sheets if necessary, ensuring a single layer with ample space between each piece. Air circulation is essential for the moisture to evaporate and for the maillard reaction (the browning and crisping process) to occur properly. If you’re roasting a large batch, don’t hesitate to use two or even three sheets.
High Heat and a Hot Start
To achieve that beautiful caramelization and crisp exterior, high heat is indispensable. Preheat your oven to a minimum of 400°F (200°C), and for many vegetables, even 425-450°F (220-230°C) is ideal. But here’s a pro tip: preheat your baking sheet too! Placing your oiled vegetables onto a hot baking sheet creates an immediate sizzle, kick-starting the browning process and preventing sticking.
Simply place your empty baking sheet(s) in the oven while it preheats. Once hot, carefully add your prepared vegetables in a single layer. This initial blast of heat is crucial for developing that desirable crispy crust and vibrant color that makes for stunning foodie photos.

The Finishing Touches: Elevate Flavor and Vibrancy
Once your vegetables are roasted to perfection – tender on the inside, crisp and golden on the outside – it’s time for the final flourish to enhance both flavor and visual appeal. A squeeze of fresh lemon juice or a drizzle of balsamic glaze just after they come out of the oven can brighten their flavor and add a beautiful sheen. Fresh herbs, like parsley, cilantro, or chives, chopped and sprinkled over the top, add a burst of fresh color and aroma.
For an extra pop of color, consider adding ingredients like cherry tomatoes or thinly sliced bell peppers towards the end of the roasting time, so they soften slightly but retain their vibrant hues. A sprinkle of flaky sea salt just before serving also adds a delightful textural contrast and visual sparkle, making your roasted vegetables truly ready for their close-up.
Conclusion: Master the Art of the Perfect Roast
With these techniques – thorough drying, uniform cuts, proper oiling, generous spacing, high heat, and thoughtful finishing touches – you can consistently produce roasted vegetables that are not only incredibly delicious but also visually spectacular. Say goodbye to soggy, dull veggies and hello to vibrant, crisp creations that will impress both your palate and your camera lens. Experiment with different vegetables and seasonings, and enjoy the delicious journey to roasting perfection!