How to perfectly plate any dish for stunning food photography?
The Art of Visual Culinary Presentation
In the age of social media, food isn’t just about taste; it’s about presentation. A beautifully plated dish can elevate a simple meal to an art form, captivating viewers and making them salivate with just a glance. For food photographers, mastering the art of plating is as crucial as mastering camera settings. It’s the silent storyteller that sets the mood, highlights textures, and invites the viewer to imagine the flavors within.
Perfect plating for photography goes beyond just arranging food neatly. It involves an understanding of design principles, an eye for detail, and a touch of creativity to ensure every element contributes to a cohesive and appealing visual narrative. Let’s delve into the techniques that will make your dishes shine through the lens.
Key Principles of Perfect Plating
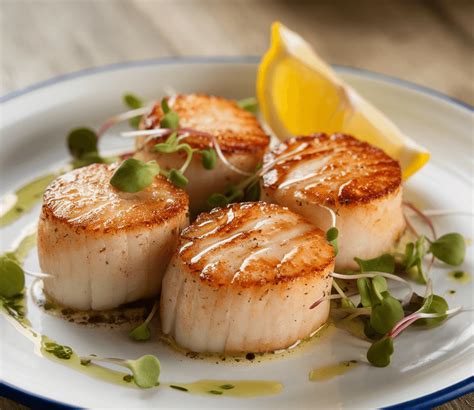
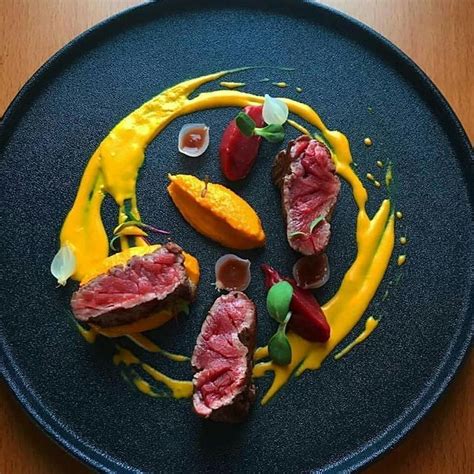
1. Balance and Harmony
Think of your plate as a canvas. You want to create a balanced composition that feels natural and not overcrowded. Avoid piling food high; instead, spread elements thoughtfully. Consider the rule of thirds, using the plate’s edges and center to guide your placement. Harmony is achieved when all components – colors, textures, and shapes – work together without one overwhelming the others.
2. Color and Contrast
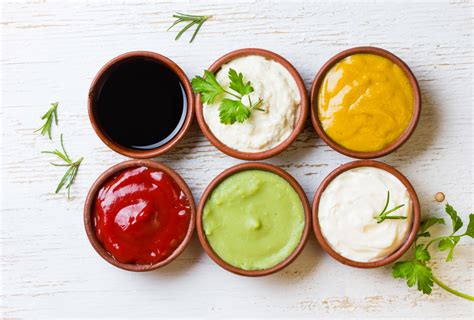
Colors are vital for visual appeal. Use a variety of fresh, vibrant ingredients to add natural pops of color. Contrast isn’t just about light and dark; it can be between hot and cold elements, smooth and crunchy textures, or bright and muted colors. A touch of contrasting color, like a bright herb on a rich sauce, can make a dish truly stand out.
3. Texture and Dimension
A photograph is a two-dimensional medium, so creating perceived dimension through texture is key. Include ingredients with varied textures – creamy, crunchy, smooth, crispy – to add visual interest. Layering ingredients or stacking them slightly can also add height and depth, making the dish more dynamic.
4. Focal Point
Every great dish needs a star. Identify your main ingredient and make it the focal point. Arrange other elements around it in a way that guides the viewer’s eye towards this central element, telling a story about the dish’s main component.
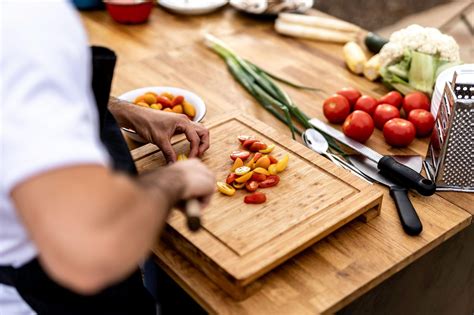
Essential Tools and Techniques
While creativity is paramount, having the right tools can significantly ease the plating process and improve precision.
- Tweezers: Ideal for delicate placement of small garnishes, microgreens, or spices.
- Squeeze Bottles: Perfect for controlled application of sauces, purees, and oils, allowing for intricate patterns or dots.
- Pastry Brushes: For sweeping sauces or oil onto plates with precision.
- Ring Molds: To create perfectly shaped bases for rice, purees, or tartares.
- Clean Cloths: Absolutely essential for wiping plate edges and removing any stray drips or smudges before photography.
The Plate Itself
Choose your plate wisely. White or neutral-colored plates are often preferred as they provide a clean backdrop that makes the food pop. Consider the shape and size – a larger plate allows for more negative space, enhancing the visual impact of your food. Matte finishes can also help reduce glare in photography.

Strategic Component Placement
How you arrange each part of your meal is crucial.
1. Main Protein/Element
Typically, this is the largest component and should be placed first, often slightly off-center to create visual interest. Consider its best angle and presentation side.
2. Starches and Vegetables
These complement the main element. Place them around the focal point, ensuring they add color and texture without overshadowing the star. Think about odd numbers – three or five small elements often look more natural and appealing than an even number.
3. Sauces and Purees
Sauces can be a background element or a decorative flourish. They can be brushed across the plate, spooned in a pool, or piped in dots or lines. Use them to connect elements or to add a splash of contrasting color.
4. Garnishes and Microgreens
These are the finishing touches that add freshness, color, and texture. Place them deliberately, ensuring they enhance the dish and don’t look like an afterthought. A few well-placed microgreens or a sprinkle of a vibrant spice can make a huge difference.
The Importance of Negative Space
Just as important as what you put on the plate is the space you leave empty. Negative space (the empty area on the plate) helps the eyes rest and allows the viewer to appreciate the composition without feeling overwhelmed. Don’t crowd your plate; let your food breathe. This also helps in framing your dish for photography, giving your subject room to stand out.

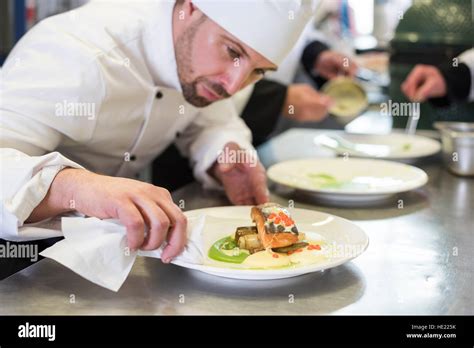
Final Touches for Photography
Before your camera even comes out, a few last-minute checks are vital:
- Clean Edges: Use a damp cloth to wipe away any drips or smudges from the plate rim. A pristine plate is non-negotiable for professional-looking photos.
- Lighting: Ensure your dish is positioned for optimal lighting (natural light is usually best) to highlight textures and colors.
- Freshness: Plate quickly, especially with delicate ingredients, to ensure everything looks fresh and vibrant.
- Adjustments: Take a moment to view the dish from the camera’s perspective. Are there any tweaks you can make to enhance its visual appeal?

Conclusion
Perfect plating is a skill that develops with practice and observation. By understanding the principles of balance, color, texture, and strategic placement, and by utilizing the right tools, you can transform any dish into a photographic masterpiece. Remember, the goal is to tell a story with your food, inviting the viewer to experience its beauty even before they taste its deliciousness. So, go forth, experiment, and plate your way to stunning food photography!