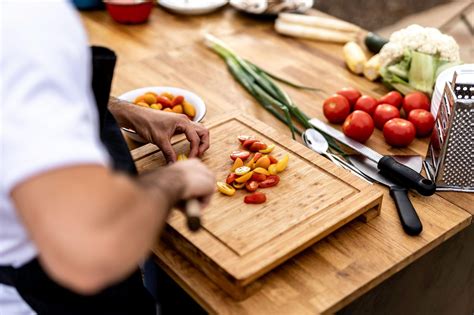
Pro plating tips for vibrant, Instagram-worthy homemade meals?

Ever wondered how restaurant chefs make their dishes look so appealing, or how food bloggers capture those stunning, drool-worthy photos? It’s all in the plating! While the taste is paramount, the visual presentation of a meal plays a huge role in the dining experience. Elevating your homemade creations from delicious to dazzling is simpler than you think. With a few professional tips, you can make your food truly Instagram-worthy.
The Art of Visual Appeal
Plating isn’t just about making food look pretty; it’s about telling a story, enhancing appetite, and even suggesting the quality of the ingredients. A well-plated dish stimulates the senses before the first bite, building anticipation and enjoyment. It shows care, creativity, and a respect for the food itself. Think of your plate as a canvas and your food as the paint – you’re creating edible art.
Master the Basics: Color, Texture, and Balance
The foundation of great plating lies in understanding these three elements. Strive for a variety of colors to make your plate pop. Incorporate different textures – crunchy, creamy, soft, crisp – to add interest and depth. Finally, ensure balance in both the visual weight and distribution of ingredients. Don’t crowd the plate; give each component room to breathe.

Strategic Arrangement Techniques
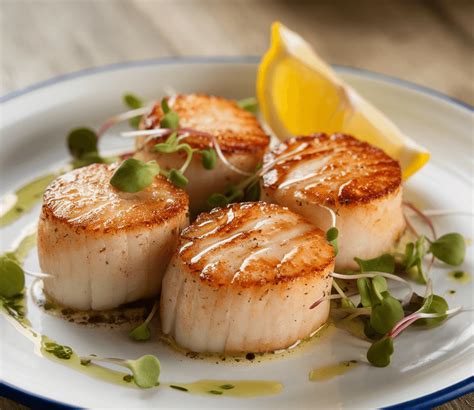
- The Rule of Odds: Odd numbers are generally more appealing to the eye than even numbers. Arrange components in groups of three or five.
- Negative Space: Don’t fill the entire plate. Leaving some empty space around your food creates a focal point and gives the dish an elegant, uncluttered look.
- Build Height: Stack ingredients to create vertical interest, but do so carefully to avoid a messy look. Think about layering components rather than just placing them flat.
- The Clock Method: For traditional plating, imagine your plate as a clock. Place starches (like potatoes or rice) at 10 o’clock, vegetables at 2 o’clock, and your protein (meat, fish, tofu) between 6 and 7 o’clock.
The Power of Garnish
Garnishes are the jewelry of your dish – they add the finishing touch. A sprinkle of fresh herbs like parsley, cilantro, or chives can add vibrant color and freshness. A drizzle of sauce, olive oil, or a balsamic glaze can provide both flavor and visual flow. Edible flowers, microgreens, or toasted nuts can add a delicate touch and textural contrast. Remember, garnishes should always be edible and complement the dish’s flavors.

Choose Your Canvas Wisely
The plate itself is crucial. White, simple plates often make the food stand out the most, as they don’t compete with the colors of the ingredients. Consider different shapes – round, square, or rectangular – to complement your dish. Bowls work wonderfully for stews, pasta, or anything with a liquid component. Ensure your plates are clean and free of smudges or drips before serving.

Lighting for That Instagram Moment
Once your masterpiece is plated, good lighting is key for capturing its beauty. Natural light near a window is usually best. Avoid harsh overhead lights or using your camera’s flash, which can create unflattering shadows and reflections. Experiment with different angles, but often, shooting from a slightly elevated angle or directly overhead works wonders for food photography.
With these plating tips, you’re well on your way to transforming your everyday homemade meals into restaurant-quality presentations. Don’t be afraid to experiment, practice, and most importantly, have fun with it. Soon, your vibrant, beautifully arranged dishes will not only delight your family and friends but also earn those coveted double taps on Instagram!