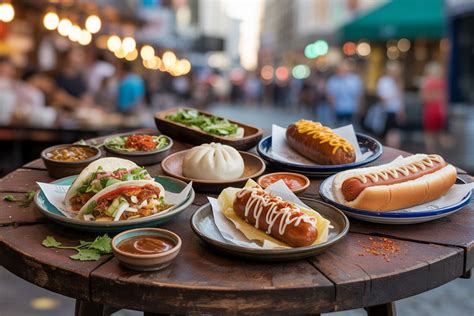
Pro plating tips: Make everyday meals Instagram-worthy for visual foodie feeds?

Gone are the days when delicious food alone was enough. In the age of visual social media, especially on platforms like Instagram, how your meal looks is almost as important as how it tastes. Turning your everyday home-cooked dishes into stunning, shareable culinary art is not as daunting as it seems. With a few professional plating tips, you can elevate your humble dinner into a feast for the eyes, guaranteed to impress your followers and boost your foodie feed.
The Foundation: Understanding Plating Principles
Before diving into specific techniques, it’s crucial to grasp the core principles that guide professional food presentation. Think about color, texture, balance, and negative space. A visually appealing plate often features a variety of vibrant colors, contrasting textures (crispy, creamy, crunchy), and a sense of harmonious arrangement. Don’t overcrowd the plate; allow for some empty space to highlight your main components.
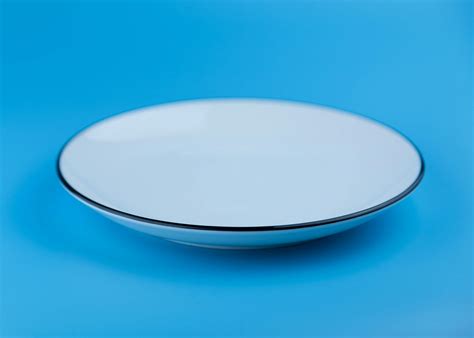
Choose Your Canvas Wisely
Your plate is the canvas, and its choice significantly impacts the final presentation. While fancy patterns might seem appealing, simple, monochromatic plates – especially white – are often the best choice. They allow the food’s colors and textures to pop without distraction. Consider different shapes and sizes; a wide-rimmed plate can provide more negative space, making the dish feel more refined.
Mastering Placement: The Clock and The Rule of Thirds
Two classic methods can guide your food arrangement: the clock method and the rule of thirds.
- The Clock Method: Imagine your plate as a clock face. Proteins often sit between 3 and 9 o’clock, starches between 9 and 12, and vegetables between 12 and 3. This creates a natural flow and balance.
- The Rule of Thirds: Similar to photography, divide your plate into an imaginary 3×3 grid. Place key elements at the intersections or along the lines for a more dynamic and interesting composition. Avoid placing everything directly in the center.
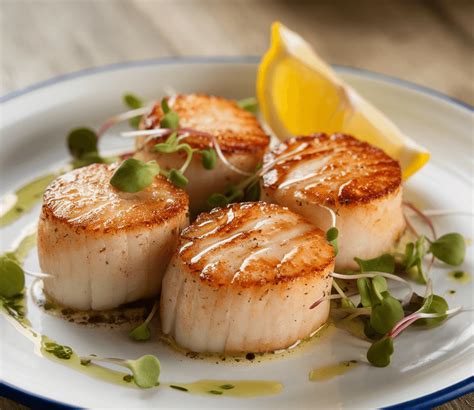
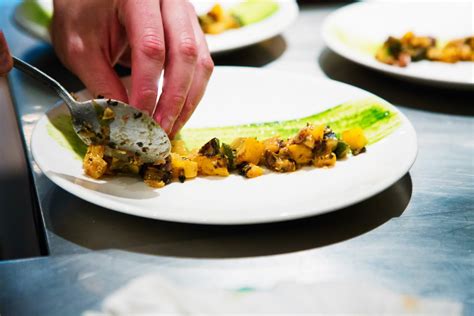
Adding Height and Dimension
Flat food rarely excites. Introducing height and dimension is key to an attractive plate. Stack components strategically – a neatly stacked pile of rice, a protein layered over a bed of purée, or vegetables arranged vertically can add visual interest. Use molds or rings for perfectly shaped mounds. Remember to build upwards, not outwards.
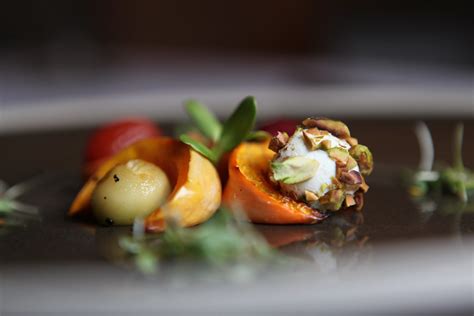
The Magic of Garnishes and Drizzles
Garnishes aren’t just for show; they can add complementary flavors and textures. A sprinkle of fresh herbs (parsley, cilantro, dill), a dusting of paprika, a swirl of vibrant sauce, or a few toasted seeds can elevate a dish from simple to spectacular. Think about contrasts: a bright green herb against a rich brown sauce, or a creamy drizzle on a crispy element. Use squeeze bottles or spoons for precision drizzles and dots.
Cleanliness is Next to Godliness
Before serving or photographing, always take a moment to wipe the rim of your plate clean with a damp cloth or paper towel. Stray drips, smudges, or fingerprints can instantly detract from an otherwise perfectly plated dish. This simple step makes a huge difference, giving your meal a professional, polished finish.
Capture the Moment: Beyond Plating
While plating is the first step, remember that good lighting and composition are crucial for an Instagram-worthy photo. Natural light is almost always best. Position your dish near a window, avoid direct harsh sunlight, and experiment with different angles – overhead shots (flat lays) are popular for revealing all ingredients, while eye-level shots highlight height and texture. A simple, uncluttered background also helps the food stand out.
Conclusion
Turning your everyday meals into visual masterpieces for Instagram is a fun and rewarding way to enhance your culinary journey. By applying these professional plating tips – from choosing the right plate and strategic placement to adding height, thoughtful garnishes, and a final wipe – you’ll not only impress your online audience but also likely enjoy your food even more. Practice regularly, get creative, and let your edible art shine!