Pro tips for making any recipe photo-ready with minimal effort?
In today’s visually driven world, sharing your culinary creations online is almost as satisfying as eating them. But you don’t need a professional studio or expensive gear to make your dishes look incredible. With a few pro tips and minimal effort, you can transform any home-cooked meal into a photo-ready masterpiece, captivating your audience and inspiring others to cook along.
Master Natural Light
The single most important factor in great food photography is good lighting. Forget artificial flashes or harsh overhead lights; seek out natural light. Position your dish near a window, but out of direct sunlight, which can create harsh shadows and blown-out highlights. Overcast days are often perfect, providing soft, diffused light. If the light is too strong, use a sheer curtain or a white sheet as a diffuser. For shadows that are too dark on one side, use a white piece of foam board or a napkin as a reflector to bounce light back onto your food.
Choose Your Angle Wisely
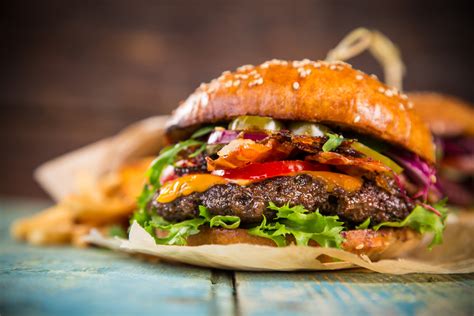
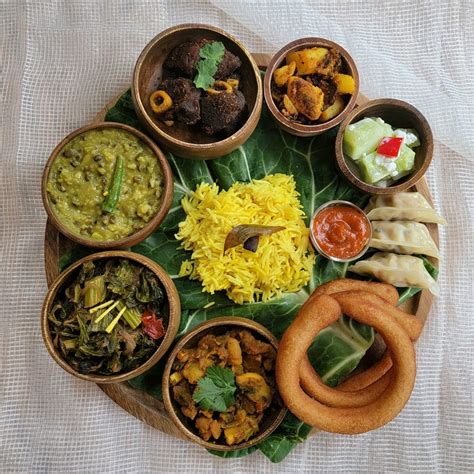
Different dishes look best from different perspectives. For flat dishes like pizzas, tarts, or intricate plate presentations, a direct overhead (90-degree) shot works wonders, showcasing the entire composition. For dishes with height, such as burgers, cakes, or stacked pancakes, a 45-degree angle (eye-level with the food) emphasizes their dimension and texture. Experiment with both to see what highlights your dish’s best features. Often, shooting slightly from above (around 30-60 degrees) is a safe bet for most recipes.
Garnish and Prop Smartly
A simple garnish can elevate a dish from drab to fab in seconds. Think fresh herbs (parsley, cilantro, mint), a sprinkle of flaky sea salt, a drizzle of olive oil, a dusting of powdered sugar, or a few berries. These add freshness, color, and texture. When it comes to props, less is often more. Choose simple, non-distracting elements like a rustic linen napkin, a clean fork, or a small, aesthetically pleasing bowl of ingredients used in the recipe. Ensure your plate is clean and free of smudges.
Keep it Clean and Compose Simply
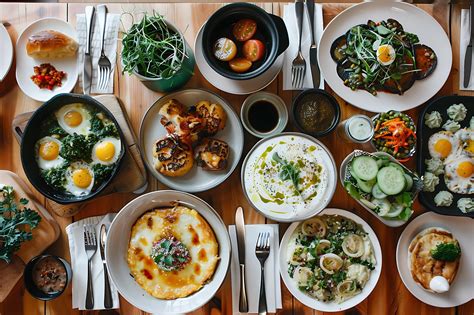
Before you even think about snapping a photo, wipe down the edges of your plate for any spills or drips. A clean presentation is crucial. For composition, the ‘rule of thirds’ is a great starting point – imagine your frame divided into a 3×3 grid and place your main subject off-center along one of the lines or intersections. Another tip is to use odd numbers of items (e.g., three cookies instead of two). Create layers and depth by strategically placing background elements slightly out of focus.

Quick Edits Make a Difference
You don’t need Photoshop to enhance your food photos. Most smartphones have excellent built-in editing tools, and free apps like Snapseed or Lightroom Mobile offer powerful features. Focus on making subtle adjustments: increase brightness slightly, boost contrast to make details pop, and adjust saturation to bring out natural colors without overdoing it. A small crop can also dramatically improve your composition. Remember, the goal is to enhance, not to drastically alter.

With these straightforward tips, you’re well on your way to taking drool-worthy food photos. The key is to practice, experiment, and most importantly, have fun with it. Your next culinary masterpiece is just a few clicks away from becoming a visual feast!