


Quick plating hacks for Insta-ready home-cooked meals?

Elevate Your Home Cooking: From Plate to Post
In today’s visually-driven world, a delicious meal isn’t just about taste; it’s also about how it looks. If you’ve ever scrolled through Instagram and wished your home-cooked dishes could look as appealing as those from professional chefs, you’re in luck! Mastering the art of plating is simpler than you think, and with a few quick hacks, you can turn your everyday meals into Insta-ready masterpieces.
No fancy equipment or culinary school required – just a keen eye and a desire to make your food shine. Let’s dive into some easy techniques that will instantly upgrade your food presentation.

1. Choose the Right Canvas: Your Plate
The foundation of any great dish presentation is the plate itself. Forget about busy patterns or clashing colors. Opt for simple, neutral-colored plates, typically white or off-white. This allows your food to be the star without distractions. Consider the size and shape – a slightly oversized plate can make a portion look more elegant and allow for negative space, which is crucial for good design. Square plates can offer a modern touch, while round ones are classic.
2. Master the “Rule of Odds” and Negative Space
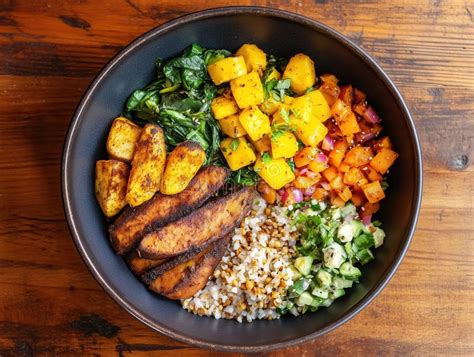
When arranging components on your plate, try to work with odd numbers (e.g., three asparagus spears instead of four). This creates a more dynamic and visually interesting composition. Equally important is leaving negative space – areas of the plate where there is no food. This gives the eye a place to rest and prevents the dish from looking cluttered. Think of your plate as a clock face, placing your main protein at 6 o’clock, starch at 10 o’clock, and vegetables at 2 o’clock.

3. Play with Color, Texture, and Height
Vibrant colors are incredibly appealing. Ensure your meal incorporates a variety of natural colors from different ingredients. If your dish is monochrome, think about adding a pop of color through a garnish. Texture adds interest – contrast soft elements with crunchy ones (e.g., a sprinkle of toasted nuts over a creamy soup). Building height adds drama and a professional touch. Stack ingredients, lean them against each other, or use a mold to create verticality, especially with starches or vegetables.
4. The Power of the Garnish
A well-chosen garnish can elevate a dish from good to great. Fresh herbs like parsley, cilantro, dill, or chives add color, freshness, and a delicate aroma. A drizzle of contrasting sauce (e.g., balsamic glaze over light-colored pasta, a swirl of crème fraîche on soup), a sprinkle of seeds, a lemon wedge, or a few edible flowers can make all the difference. Remember, garnishes should always be edible and complement the flavors of the dish.

5. Cleanliness and Presentation Tools
Before serving, always wipe the rim of your plate clean with a damp cloth or paper towel. Stray drips or smudges can ruin an otherwise perfect presentation. For more precision, consider investing in a squeeze bottle for sauces, plating tongs for delicate items, or a pastry brush for subtle oil glazes. These small tools can make a big impact on your plating accuracy.
6. Lighting and Angle for the Perfect Shot
Once your meal is beautifully plated, it’s time for the photo! Natural light is your best friend. Place your plate near a window, but avoid direct harsh sunlight, which can create strong shadows. Overcast days are often ideal. Experiment with angles – overhead shots (flat lays) work well for bowls and intricate patterns, while a slight angle can showcase height and texture. Take multiple shots and don’t be afraid to get close to capture details.

Conclusion: Practice Makes Perfect
Plating is an art form that improves with practice. Start with one or two hacks per meal, observe how professional chefs plate their dishes (online or in restaurants), and experiment with different arrangements. Soon enough, you’ll be effortlessly creating dishes that not only taste incredible but also look amazing enough to grace any Instagram feed!


