


Quickest Visual Bite hack to highlight recipe textures for foodie engagement?
The Secret Sauce: Making Textures Pop for Hungry Eyes
In the bustling world of food content, where countless recipes vie for attention, merely showing a dish isn’t enough. To truly captivate a foodie audience and drive engagement, you need to evoke more than just taste; you need to awaken their sense of touch, even through a screen. The secret lies in masterfully highlighting the inherent textures of your food. Forget bland, flat images – we’re talking about making your audience practically feel the crunch of a crust, the silkiness of a sauce, or the delicate flakiness of a pastry. This isn’t just about aesthetics; it’s about creating a multisensory experience that translates into irresistible engagement.
The “Texture Pop” Hack: Mastering Macro and Dynamic Light
The quickest and most impactful hack to highlight recipe textures is a combination of extreme close-ups (macro photography principles, even with a phone camera) paired with dramatic, directional lighting. This approach transforms ordinary ingredients into sculptural masterpieces, revealing every ridge, crumb, and sheen.
Lighting for Tactile Appeal
Lighting is your most powerful tool. Forget flat, front-on illumination. Instead, embrace:
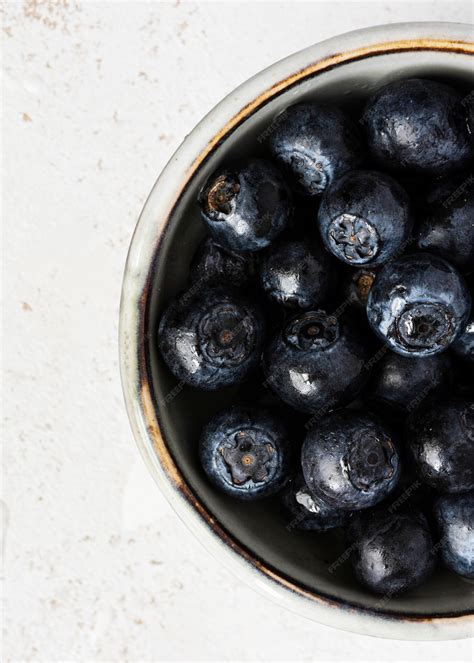
- Side Lighting: Position your light source (window light, softbox) to the side of your dish. This creates shadows that define edges, highlight contours, and give depth to textures like rough bread crusts, juicy berries, or delicate herbs.
- Backlighting: When light comes from behind the dish, it can make translucent elements glow (think sliced citrus or a glistening glaze) and create a beautiful rim light that separates your subject from the background, adding an ethereal quality to steam or smoke.
- Dramatic Shadows: Don’t be afraid of shadows! They are crucial for defining form and texture. Use reflectors (even a piece of white card) sparingly to lift only the darkest areas, maintaining contrast.
Angles and Composition that Crave a Touch
While lighting sets the stage, your camera angle brings the textures into sharp focus:
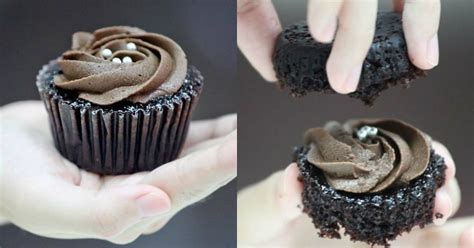
- Extreme Close-Ups: Get in tight! Fill the frame with just a portion of your dish. Focus on a specific textural element—the flaky layers of a croissant, the uneven surface of a roasted vegetable, or the bubbling crust of a casserole. This forces the viewer to confront the texture directly.
- Low Angles for Height and Volume: For dishes with height (like layered cakes or stacked pancakes), a slightly low angle emphasizes their stature and the distinct textures of each layer.
- Overhead Shots for Patterns: While not strictly about individual texture, a perfectly executed overhead shot can highlight the textural patterns of a dish, like a granola bowl or a pizza, making it visually engaging.

The Art of the Action Shot and Dynamic Elements
Beyond static images, incorporating movement or an “action shot” can powerfully convey texture:
- The “Break” or “Cut”: A fork piercing a soft cake, a knife slicing through a crisp pie, or a spoon scooping into a creamy dessert immediately communicates the dish’s internal texture.
- Drips and Drizzles: A slow drizzle of sauce or honey over a dish not only adds visual appeal but also highlights the viscosity and lusciousness of the liquid texture.
- Sprinkles and Garnishes: The act of sprinkling fresh herbs, powdered sugar, or cheese creates a dynamic textural moment.

Props and Backgrounds: Supporting Texture Stars
The elements surrounding your food should complement, not distract, from its textures:
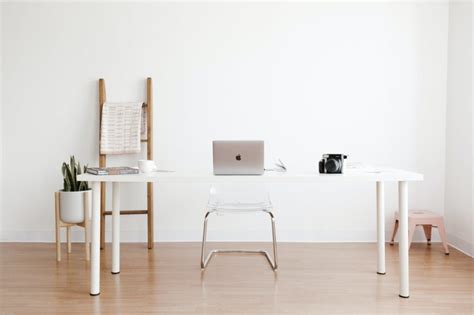
- Minimalist Backgrounds: Use plain, muted backgrounds (wood, stone, linen) that have some subtle texture themselves but don’t compete with the food. This helps the food’s texture stand out.
- Textured Props: Incorporate props that subtly echo or contrast with the food’s texture. A rustic wooden board under a smooth sauce, or a coarse linen napkin beside a delicate pastry.
Post-Processing for the Perfect Touch
A few minor adjustments in post-processing can make all the difference:
- Contrast: Gently increase contrast to deepen shadows and brighten highlights, enhancing the textural definition.
- Sharpness: A slight increase in sharpness can make subtle textures pop without making the image look artificial.
- Clarity/Texture Sliders: Many editing apps have “clarity” or “texture” sliders. Use them sparingly to enhance mid-tone contrast and bring out details.
Conclusion: Make Them Feel It!
By focusing on extreme close-ups and harnessing the power of directional lighting, you can quickly transform your food visuals from mere depictions to immersive, tactile experiences. This “Texture Pop” hack isn’t just about pretty pictures; it’s about crafting a visual narrative that makes your audience salivate, engage, and ultimately, want to try your recipe. Experiment with these techniques, pay attention to the subtle dance of light and shadow, and watch as your foodie engagement soars!


