


Recipe tweaks for visual appeal: how to make food photo-ready for your feed?
In today’s visually-driven world, a dish isn’t truly complete until it’s been admired (and perhaps photographed) by your followers. Gone are the days when taste alone was king; now, the camera eats first! But fear not, turning your delicious home-cooked meals into Instagram-worthy masterpieces is easier than you think. It’s all about making small, deliberate tweaks to your recipes and presentation.
The Power of Presentation: Why Visuals Matter
Before anyone even takes a bite, their eyes have already made a judgment. A beautifully presented dish not only whets the appetite but also communicates care, skill, and passion. Whether you’re sharing a simple weeknight dinner or an elaborate feast, elevating its visual appeal can transform the entire dining experience, both online and off.

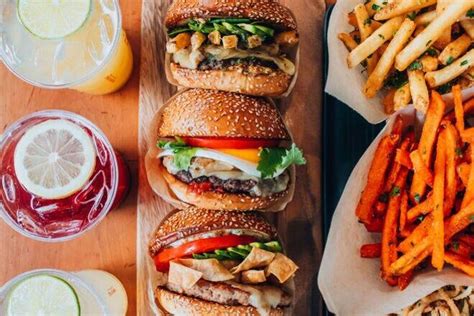
Color and Contrast: A Feast for the Eyes
One of the easiest ways to make your food pop is by paying attention to its color palette. Think vibrant greens, rich reds, and sunny yellows. If your dish is monochromatic (like a creamy soup or a stew), consider adding a contrasting splash of color. A sprinkle of fresh herbs, a swirl of brightly colored sauce, or a few diced vegetables can make a world of difference. Contrast also applies to the background and the plate itself – choose neutral colors that allow your food to be the star.
Texture Talk: Adding Depth and Interest
Visual appeal isn’t just about color; texture plays a crucial role too. A dish with varying textures is inherently more interesting to look at. Think about adding a crunchy element to a soft dish (like croutons on soup or toasted nuts on a salad), or a smooth sauce to a rustic main course. This contrast in textures translates beautifully on camera, creating depth and inviting curiosity.
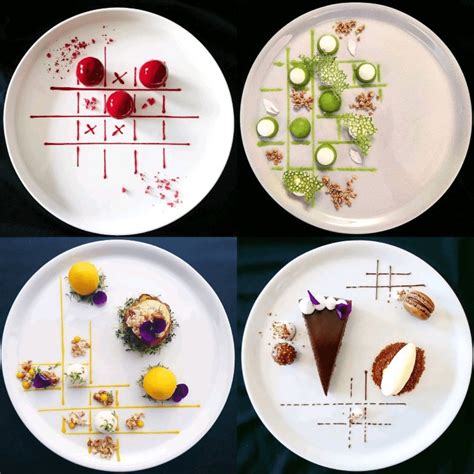
The Art of Plating: Less is More (or Strategically More)
Plating is where the magic truly happens. Instead of simply piling food onto a plate, think of it as an artist’s canvas. Use the rule of thirds, leaving some negative space to make your main elements stand out. Build height where appropriate – a stack of pancakes, a carefully arranged tower of vegetables, or a protein gently leaning. Don’t overcrowd the plate; let each component breathe and show off its best side. A clean plate edge is also essential for a professional look.
Garnish Like a Pro: The Finishing Touches
Garnishes are not just for decoration; they add freshness, flavor, and a professional touch. A few strategically placed sprigs of fresh herbs (parsley, cilantro, dill), a dusting of paprika, a lemon wedge, or a drizzle of olive oil can instantly elevate a dish. Choose garnishes that complement the flavors of your meal and add a burst of color or shine. Remember, less is often more – don’t overwhelm the main dish.
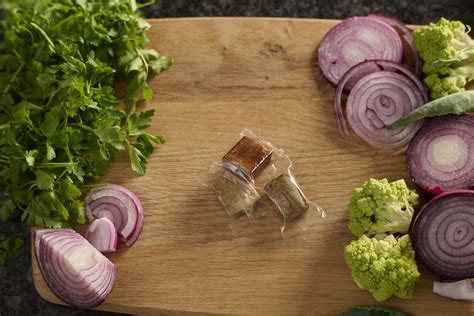
Lighting and Props (Briefly): Beyond the Plate
While this article focuses on recipe tweaks, remember that good lighting is paramount for any food photo. Natural light is almost always your best friend. Position your plate near a window but out of direct sunlight. As for props, keep them simple and relevant. A rustic cutting board, a linen napkin, or a vintage fork can add character without distracting from the food itself. The key is to create an inviting scene that enhances, rather than detracts from, your culinary creation.

Conclusion: Practice Makes Perfect (and Photo-Ready)
Making your food photo-ready is an evolving skill, much like cooking itself. Start with small changes: focus on one aspect like plating or garnishing with each new dish. Experiment with different angles and arrangements. Soon, these tweaks will become second nature, and your social media feed will be filled with delectable, visually stunning food that’s sure to impress your followers and inspire others to get cooking!


