Secret to perfectly caramelized onions for deep flavor & stunning visuals?
The Magic of Maillard: Why We Crave Caramelized Onions
There are few ingredients as humble yet as transformative as the onion. While raw, it offers a pungent bite, but when coaxed slowly over heat, it undergoes a magical metamorphosis. This isn’t just about softening; it’s a profound chemical change known as the Maillard reaction, where sugars and amino acids break down and recombine, creating hundreds of new flavor compounds. The result? A deep, complex sweetness, a luscious texture, and a stunning golden-brown hue that makes caramelized onions a beloved culinary staple.
Achieving this perfection, however, is often seen as a daunting task, requiring endless patience and a touch of culinary wizardry. But fear not! The secret lies not in complex techniques, but in understanding a few fundamental principles and embracing the journey.
Essential Tools & Ingredients for Success
Before you begin your caramelization quest, ensure you have the right equipment and ingredients at hand. Simplicity is key, but quality makes a difference:
- Onions: Yellow or red onions work best due to their higher sugar content. Choose firm, unblemished onions.
- Fat: A combination of olive oil and butter provides the best of both worlds – the smoke point of oil and the rich flavor of butter.
- Salt: Essential for drawing out moisture and enhancing flavor.
- A heavy-bottomed pan: A wide, heavy-bottomed skillet or Dutch oven ensures even heat distribution and prevents scorching.
- A sturdy spatula or wooden spoon: For consistent stirring.
- Optional: A splash of water, wine, or broth for deglazing.
The Step-by-Step Path to Golden Perfection
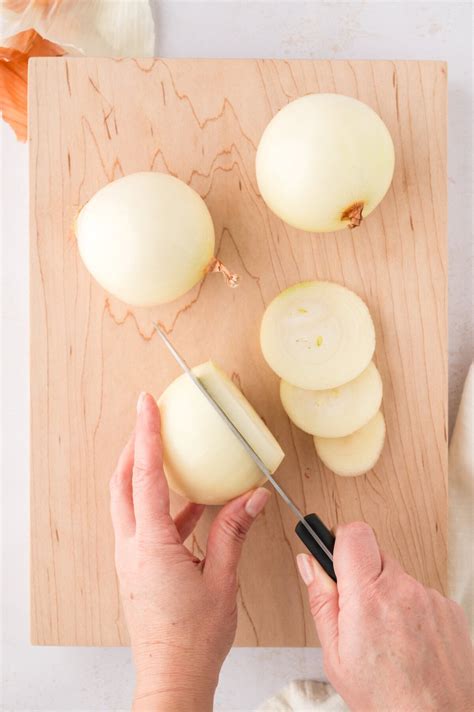
Step 1: Prep Your Onions
Begin by peeling your onions. The most consistent slices are crucial for even cooking. Halve the onions from root to stem, then place the cut side down. Slice them thinly (about 1/8 to 1/4 inch thick) in the direction of the root to stem. This parallel cut helps the onion retain its structure as it cooks down.
Step 2: The Right Fat & Heat
Heat your heavy-bottomed pan over medium-low heat. Add a generous amount of your chosen fat – typically 1-2 tablespoons of oil and butter per large onion. Once the butter is melted and foaming, add your sliced onions. Stir to coat them evenly with the fat. Sprinkle lightly with salt; this helps draw out moisture, speeding up the initial softening process.
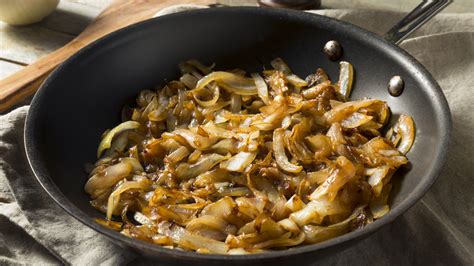
Step 3: The Long Sizzle
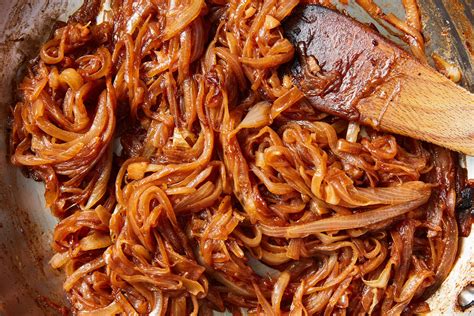
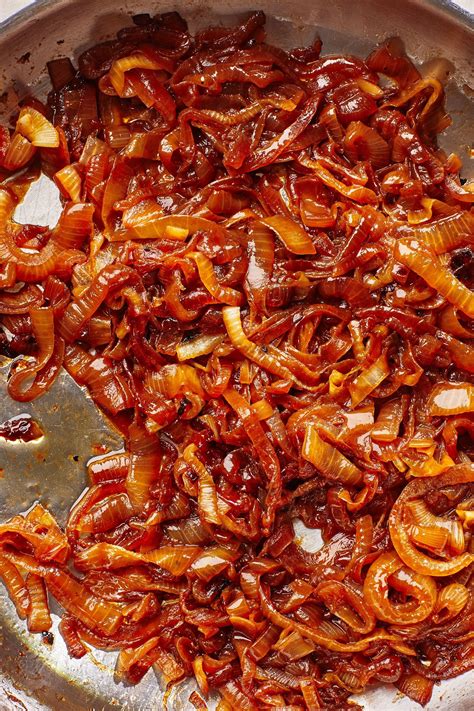
This is where patience becomes your most valuable ingredient. Maintain a consistent medium-low heat. The goal is to slowly cook the onions, allowing their natural sugars to develop and caramelize without burning. Stir frequently, every 5-10 minutes, to ensure even browning and prevent sticking. Initially, the onions will release moisture and soften. After about 15-20 minutes, they’ll start to turn translucent. Gradually, over 30-60 minutes (depending on the quantity and heat), they will transform from white to pale yellow, then golden, and finally a rich, deep brown.
Step 4: Deglazing for Deeper Flavor
As the onions caramelize, dark bits (fond) will accumulate on the bottom of the pan. These are packed with flavor! To incorporate them, deglaze the pan. When the onions reach your desired color, add a tablespoon or two of water, wine (red or white), or broth. Scrape the bottom of the pan vigorously with your spatula to release the fond, stirring it back into the onions. This not only adds depth of flavor but also prevents burning and helps achieve an even color.
Step 5: The Final Watch
Continue cooking and stirring, allowing the liquid to evaporate. Watch carefully in these final stages, as the onions can go from perfectly caramelized to burnt very quickly. The ideal stage is a deep, rich brown color, a sweet aroma, and a jam-like, melt-in-your-mouth texture.
Common Pitfalls & Pro Tips
- Don’t Rush It: The biggest mistake is high heat. Caramelization takes time. Embrace the slow cook for best results.
- Don’t Overcrowd the Pan: If you’re cooking a large batch, use two pans or work in batches. Overcrowding steams the onions instead of browning them.
- Season Gradually: While an initial pinch of salt is good, add more seasoning towards the end, as the volume reduces significantly.
- Patience, Patience, Patience: We can’t stress this enough. Set aside 45 minutes to an hour and enjoy the process.
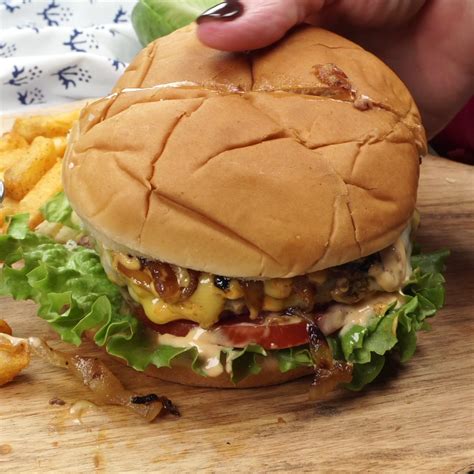
Elevate Your Dishes: Uses for Caramelized Onions
Once you’ve mastered this technique, a world of culinary possibilities opens up. Caramelized onions are incredibly versatile:
- Spread them on burgers, sandwiches, or paninis.
- Fold them into omelets, quiches, or frittatas.
- Use them as a topping for pizzas or flatbreads.
- The essential base for French onion soup.
- Add them to gravies, stews, or roasts for incredible depth.
- Serve alongside grilled meats or roasted vegetables.
- Turn them into a delightful dip or tart filling.
Conclusion
Perfectly caramelized onions are more than just a side dish; they are a testament to the power of patient cooking and a fundamental skill every home chef should master. With just a few simple ingredients and a commitment to low, slow heat, you can unlock a depth of flavor and a visual appeal that will elevate countless dishes. So, next time you’re in the kitchen, grab some onions, a heavy pan, and embark on this delicious journey – your taste buds (and your guests) will thank you.