


Specific food photography hacks for Visual Bites that convert foodies to recipe clicks?
In the vibrant world of Visual Bites, merely showcasing delicious food isn’t enough; the goal is to create an irresistible visual journey that directly translates into recipe exploration. Turning a casual scroll into a click requires more than just a pretty picture – it demands strategic photographic techniques that speak to a foodie’s soul. Here are specific hacks to elevate your food photography and boost those recipe click-throughs.
Mastering Natural Light: Your Ultimate Ingredient
Natural light is arguably the most powerful tool in a food photographer’s arsenal. It renders food colors accurately, creates soft shadows, and adds an inviting warmth that artificial lights often struggle to replicate. Position your food near a window, ideally with indirect light to avoid harsh shadows. A sheer curtain or parchment paper can act as a natural diffuser, softening the light even further.
Experiment with side lighting or backlighting to highlight textures and create dramatic rim lighting around your dishes. Avoid direct overhead light from the sun, which can flatten your image and create undesirable hot spots. A simple white foam board can be used as a reflector to bounce light back into shadow areas, making your food pop.

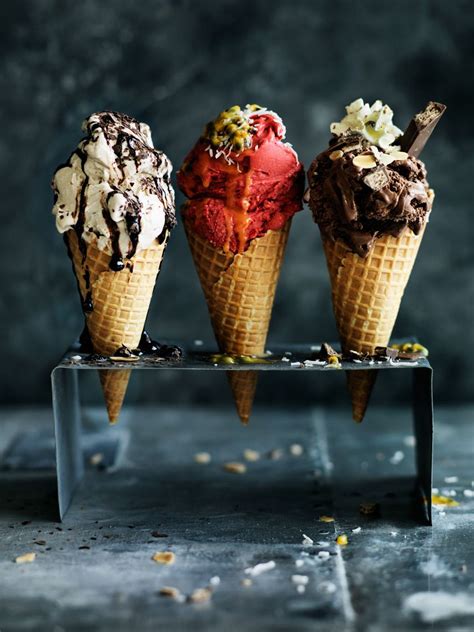
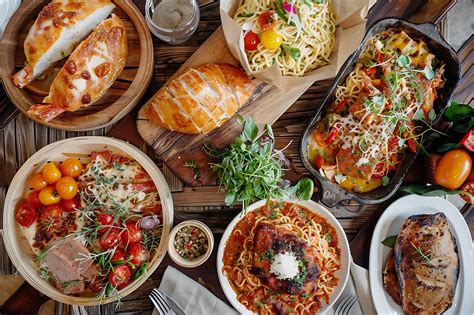
Composition That Tells a Mouthwatering Story
The way you arrange elements within your frame significantly impacts how viewers perceive your dish. Utilize the rule of thirds by placing your main subject off-center, creating a more dynamic and engaging image. Leading lines, such as cutlery, breadsticks, or the edge of a plate, can draw the viewer’s eye directly to the focal point – your delicious food.
Don’t be afraid of negative space; it allows your subject to breathe and stand out. A minimalist approach often works wonders on platforms like Visual Bites, preventing visual clutter. Consider the depth of field: a shallow depth of field with a blurred background (bokeh) can beautifully isolate your dish, making it the undeniable star of the show and enticing viewers to learn more about its creation.
Strategic Props and Thoughtful Styling
Props should enhance, not distract, from your food. Choose props that complement the dish’s story and color palette, adding context without overpowering the main subject. Think about the mood you want to convey: rustic wooden boards for comfort food, elegant ceramics for fine dining, or fresh herbs for healthy recipes.
The best props are often simple and relevant – a crumbled napkin, a few stray crumbs, or a drizzle of sauce can suggest a dish is about to be enjoyed or has just been made, adding a sense of authenticity and a human touch. These subtle details create an atmosphere that makes viewers imagine themselves experiencing the meal, driving them to click for the recipe.
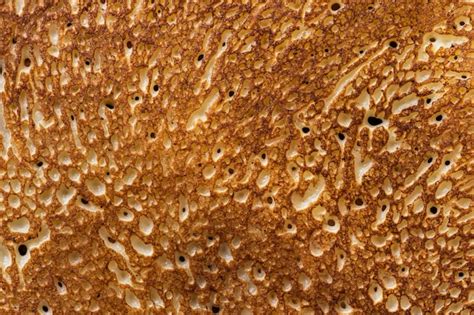
Highlighting Color, Texture, and Freshness
Food is inherently sensory, and your photographs should reflect that. Emphasize vibrant colors through fresh ingredients and thoughtful plating. Contrasting colors (e.g., bright green basil on a red tomato dish) create visual interest and appeal. Use garnishes strategically to add pops of color and freshness.
Texture is equally important. Capture the crispiness of a crust, the gooeyness of melted cheese, or the flaky layers of pastry. Close-up shots can be incredibly effective here, inviting viewers to almost feel the food. Showing steam rising from a hot dish or condensation on a cold drink immediately conveys freshness and desirability, making the recipe irresistible.
The Power of Perspective and Angles
Different angles highlight different aspects of a dish. An overhead or ‘flat lay’ shot is perfect for showcasing multiple components of a meal, intricate plating, or beautiful patterns on plates. This angle works exceptionally well for dishes served in bowls, on cutting boards, or with many small, distinct elements.
A 45-degree angle, mimicking how one would look at their plate while sitting at a table, is often the most natural and relatable. It provides a good view of the dish’s height and layers. For towering burgers, multi-layered cakes, or drinks, a straight-on (0-degree) angle emphasizes grandeur and scale. Experimenting with angles can reveal the most appetizing view for each specific dish.
Post-Production Polish for Perfection
While the initial capture is crucial, subtle post-processing can significantly enhance your images without making them look artificial. Adjust white balance to ensure colors are true to life. Boost contrast slightly to add depth and make textures pop. A touch of saturation can make colors more vibrant, but be careful not to overdo it, as it can make food look unnatural.
Sharpening can define edges and make details clearer, while minor exposure adjustments can brighten or darken areas to guide the viewer’s eye. Remember, the goal is to enhance the natural beauty of the food, not to create an entirely new reality. A well-edited photo looks fresh, clean, and utterly appetizing.
By integrating these specific food photography hacks into your Visual Bites strategy, you’re not just taking pictures; you’re crafting visual invitations. Each hack aims to evoke emotion, tell a story, and ultimately, convert curious foodies into eager recipe explorers, making your content truly clickable and impactful on the platform.


