


Visual Bites: How to maximize quick, mouth-watering food visuals for recipe clicks?
The Irresistible Power of a Visual First Impression
In the fast-paced world of digital content, a picture truly is worth a thousand words, especially when it comes to food. Before anyone even reads your ingredient list or cooking instructions, their eyes will feast upon your food visuals. A captivating image can stop endless scrolling, spark immediate hunger, and compel a click, turning a casual browser into an eager chef. Maximizing these quick, mouth-watering visual bites is not just about aesthetics; it’s a strategic move to drive traffic and engagement to your recipes.
So, how do you ensure your food photos are doing the heavy lifting? It starts with understanding the psychology behind visual appeal and implementing simple yet effective techniques that transform ordinary dishes into culinary masterpieces ready for their close-up.
Mastering Quick Food Styling for Maximum Impact
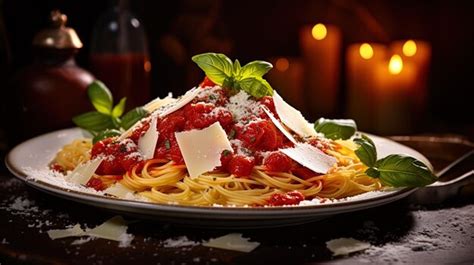
You don’t need a professional stylist to make your food look incredible. Often, less is more. Focus on the hero of the dish. What makes it special? Is it a gooey cheese pull, a perfectly seared crust, or vibrant fresh herbs? Highlight that element.
- Keep it Fresh: Always photograph food as soon as it’s ready. Wilted greens or deflated soufflés lose their appeal quickly.
- Garnish Wisely: A sprinkle of fresh herbs, a zest of citrus, a dollop of cream, or a drizzle of sauce can elevate a dish from good to gourmet. Choose garnishes that complement the dish’s flavors and add contrasting color or texture.
- Use Props Sparingly: Simple, uncluttered backgrounds and minimal props (a rustic wooden board, a linen napkin, a single fork) allow the food to shine. Avoid anything that distracts from the main subject.
Lighting is Your Secret Ingredient
Good lighting can make even a simple dish look extraordinary, while poor lighting can make a gourmet meal appear unappetizing. Natural light is almost always your best friend.
- Embrace Natural Light: Position your dish near a window, but avoid direct sunlight which can create harsh shadows and overexposed areas. Diffuse strong sunlight with a sheer curtain or a piece of parchment paper.
- Back or Side Lighting: These angles create depth, highlights, and appealing shadows that make food look more three-dimensional and appetizing.
- Avoid Overhead Lighting: Overhead kitchen lights often cast unflattering, flat shadows that make food look dull and unappetizing.

Composition and Angles That Convert
How you frame your shot and the angle you choose can dramatically alter the perception of your food. Experiment to find what works best for each dish.
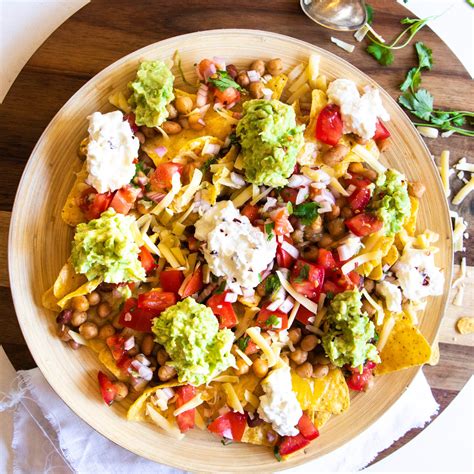
- The Overhead Shot (Flat Lay): Perfect for showcasing an entire meal, a spread of ingredients, or dishes with beautiful top textures (pizzas, tarts, bowls of soup). It offers a clean, graphic appeal.
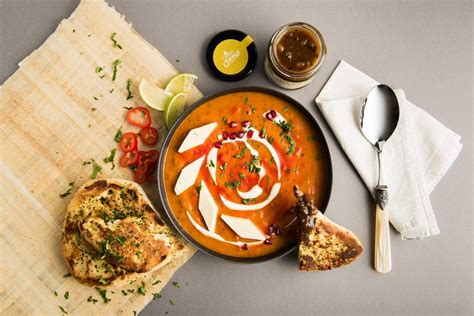
- The 45-Degree Angle: Mimics how we naturally view a plate of food. It’s versatile and great for showing off the depth and layers of a dish.
- The Eye-Level Shot: Best for dishes with height, like burgers, stacked pancakes, or layered cakes. It gives a more intimate, close-up perspective.
- Rule of Thirds: Imagine dividing your image into nine equal parts with two horizontal and two vertical lines. Place key elements along these lines or at their intersections for a more dynamic and engaging composition.
Post-Processing Perfection: Quick Edits, Big Impact
Even with great styling and lighting, a little post-processing can elevate your images from good to stunning. You don’t need complex software; many free apps offer powerful editing tools.
- Adjust Brightness and Contrast: Brightening your image can make food look fresher and more appealing. Boost contrast to add punch and definition.
- Color Correction: Ensure your food’s colors are true to life and vibrant. Use white balance tools to remove any unwanted color casts (e.g., yellow from artificial light).
- Sharpening: A touch of sharpening can make details pop, like the crispness of a crust or the texture of a sauce.
- Crop for Impact: Crop out distracting elements and focus tightly on the most appealing parts of the dish.
Understanding Your Audience: What Makes Them Click?
Ultimately, your visuals need to resonate with your target audience. Are they looking for quick weeknight meals, elaborate weekend projects, or healthy options? Tailor your visual storytelling to their desires.
- Emotion Over Perfection: Sometimes a slightly imperfect, real-life shot that evokes warmth, comfort, or joy can perform better than a hyper-perfect, sterile image. Show hands, steam, or a bite being taken.
- Consistency is Key: While experimenting, try to develop a consistent visual style or aesthetic across your recipe content. This helps build brand recognition and trust.
- Analyze and Adapt: Pay attention to your analytics. Which images get the most clicks and engagement? Learn from what works and refine your approach.
Conclusion: Feast Your Eyes, Feed Your Clicks
In the digital kitchen, visuals are the appetizers that entice users to explore the main course – your delicious recipes. By applying these quick, actionable tips for styling, lighting, composition, and post-processing, you can transform your food photography. Remember, the goal is to create visuals so mouth-watering, so appealing, that they leave no doubt in a viewer’s mind: they absolutely *must* try this recipe. Start experimenting today, and watch your recipe clicks soar!


