


What are the best plating techniques for photogenic recipe results?

In today’s visually driven world, a recipe’s appeal often starts long before the first bite – it begins with the photo. Whether you’re sharing your culinary creations on social media, a food blog, or with friends and family, understanding the art of plating can dramatically elevate your dish from merely tasty to truly photogenic. It’s about more than just food; it’s about telling a story, creating an experience, and making your viewers salivate with their eyes. Let’s explore the essential plating techniques that will make your recipe results shine.
The Foundation: Choose Your Canvas Wisely
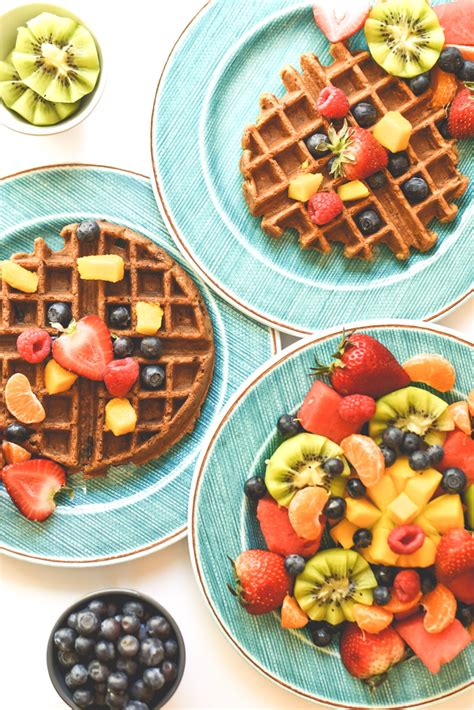
The plate itself is your canvas, and its characteristics can significantly influence the overall presentation. Opt for neutral-colored plates, typically white or off-white, as they allow the vibrant colors of your food to pop without distraction. Consider the shape – round plates are classic, but square or rectangular options can add a modern edge. Most importantly, choose a plate size that allows for adequate negative space around your food. Overcrowding a plate makes it look messy and unappetizing in photos, while ample space emphasizes the dish’s focal point.
Mastering the Art of Arrangement
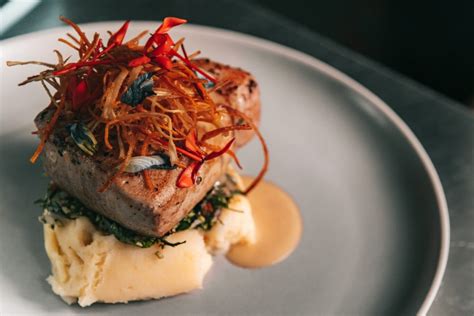
How you arrange components on the plate is crucial. One popular guideline is the ‘rule of odds,’ where an odd number of elements (e.g., three asparagus spears, five shrimp) is often more visually appealing and dynamic than an even number. Think in terms of a clock face: place your main protein between 3 and 9 o’clock, starches between 9 and 12, and vegetables between 12 and 3.
Building height and dimension adds visual interest. Don’t let your food lie flat. Stack ingredients artfully, lean components against each other, or use garnishes to create upward movement. This not only makes the dish look more professional but also adds depth that translates beautifully in photographs.

Color, Contrast, and Texture
A visually appealing dish is a feast for the eyes, and color plays a huge role. Incorporate a variety of vibrant, contrasting colors using natural ingredients. Think about the interplay between, say, a deep red tomato, bright green herbs, and golden-brown roasted chicken. Contrast isn’t just about color; it’s also about texture. Pair creamy sauces with crispy elements, soft proteins with crunchy vegetables, or smooth purees with rustic garnishes to add tactile interest that translates visually.
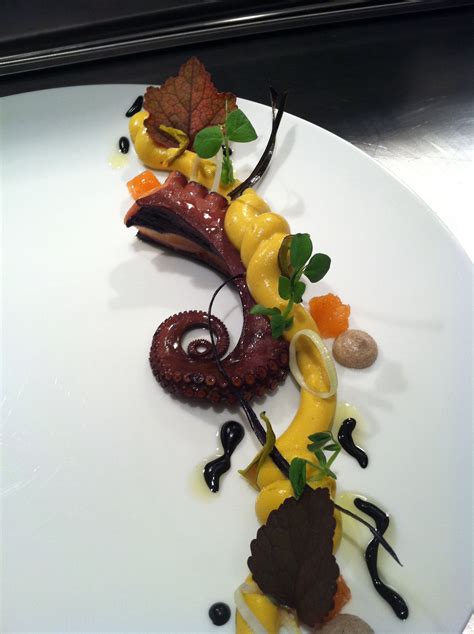
The Finishing Touches: Garnishes and Sauces
Garnishes are not just for show; they can add essential flavor, aroma, and visual appeal. Use fresh herbs like parsley, cilantro, or dill, a sprinkle of spices, a lemon wedge, or even edible flowers sparingly to enhance the dish. Ensure garnishes are proportionate to the main dish and complement its flavors rather than overpower them. Sauces, too, can be a powerful plating tool. Instead of pouring sauce all over, try drizzling it artfully, creating a swoosh with the back of a spoon, or placing a controlled dollop strategically. This adds moisture and shine without obscuring the main ingredients.
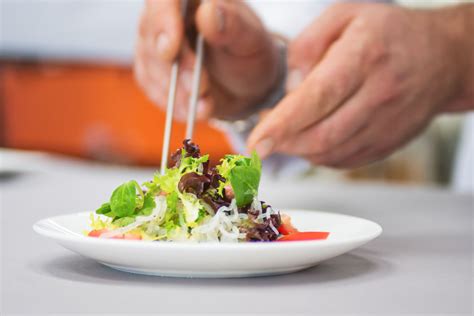
Practice Makes Perfect
Like any skill, mastering plating techniques takes practice. Don’t be afraid to experiment with different arrangements, garnishes, and plate choices. Take photos from various angles to see what works best and what highlights your dish most effectively. Pay attention to how professional chefs and food stylists plate their dishes for inspiration, but always add your unique touch.
Ultimately, the goal of photogenic plating is to make your food irresistible. By thoughtfully considering your plate choice, arrangement, colors, textures, and finishing touches, you can transform your home-cooked meals into professional-looking culinary art that’s ready for its close-up. So, grab your camera, and start plating like a pro!


