What camera settings guarantee vibrant, mouth-watering food adventure photos?
Mastering the Basics: Aperture, Shutter Speed, and ISO
To truly capture the irresistible allure of a steaming bowl of street noodles or a beautifully plated dessert in a Michelin-star restaurant, understanding the holy trinity of exposure – aperture, shutter speed, and ISO – is paramount. These settings work in concert to control the light entering your camera, directly impacting the brightness, sharpness, and depth of field in your food photos.
Aperture (f-stop): For that classic, creamy bokeh effect that makes your dish pop off the background, a wide aperture (smaller f-number like f/1.8 or f/2.8) is your best friend. This creates a shallow depth of field, drawing the viewer’s eye directly to the most delicious part of your food. For a wider scene, perhaps showing the ambiance of a bustling market, a narrower aperture (larger f-number like f/5.6 or f/8) will keep more elements in focus.
Shutter Speed: When photographing stationary food, you generally don’t need a super-fast shutter speed. However, if you’re capturing steam, a pouring sauce, or the action of a chef plating, a faster shutter speed (e.g., 1/250s or higher) will freeze the motion. For static shots, a speed around 1/60s or 1/125s is often sufficient, especially when hand-holding. If using a tripod, you can go much slower to allow more light in, keeping ISO low.
ISO: The ISO setting determines your camera’s sensitivity to light. The golden rule for food photography is to keep your ISO as low as possible (e.g., ISO 100 or 200) to minimize digital noise and maintain image quality. Only increase ISO when absolutely necessary, such as in dimly lit restaurants where natural light is scarce and a tripod isn’t an option. High ISO can degrade the texture and vibrancy of your food.
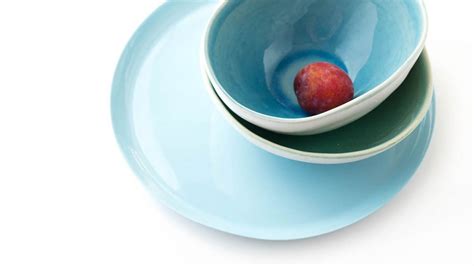
White Balance and Color Vibrancy
Achieving vibrant, true-to-life colors is crucial for mouth-watering food photos. This is where white balance comes into play. Incorrect white balance can cast an undesirable color tint, making food look unappetizing or dull.
Custom White Balance: While auto white balance (AWB) works well in many situations, custom white balance offers the most accurate color representation, especially under challenging lighting conditions like tungsten or fluorescent lights. You can use a grey card or a white object in your scene to set a precise white balance, ensuring that whites are truly white and all other colors are rendered accurately.

Picture Styles/Profiles: Many cameras offer built-in picture styles or creative profiles (e.g., ‘Vivid,’ ‘Standard,’ ‘Neutral’). Experiment with these, but often ‘Standard’ or ‘Neutral’ provides a good starting point, allowing for more flexibility in post-processing. A ‘Vivid’ setting might boost saturation and contrast directly in-camera, which can be great for quick shares but less ideal for extensive editing.
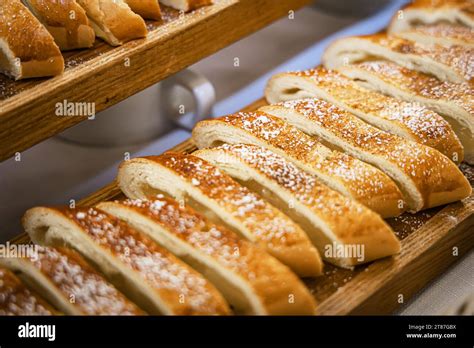
Focusing for Delicious Detail
Sharpness is non-negotiable in food photography. A blurry image instantly detracts from the appeal of even the most exquisite dish.
Single-Point Autofocus: Use single-point autofocus and meticulously place your focus point on the most appealing element of your dish – perhaps a glistening sauce, a perfectly cooked piece of meat, or the intricate details of a garnish. This ensures maximum sharpness where it matters most.
Manual Focus: In challenging light or when working with very shallow depth of field, manual focus can offer greater precision. Use your camera’s live view and zoom function to pinpoint critical focus accurately.
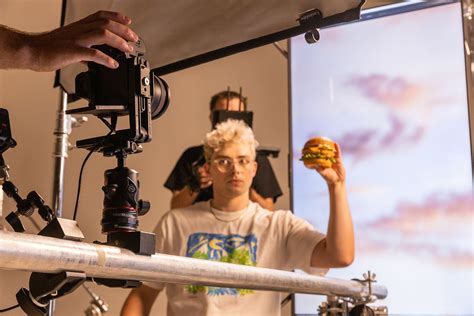
Lighting for Luster and Texture
While not strictly a camera setting, understanding light is intrinsically linked to how your camera captures an image. Natural light is almost always preferred for food photography.
Soft, Diffused Natural Light: Position your food near a window, but avoid direct sunlight, which can create harsh shadows and blown-out highlights. Use a diffuser (a sheer curtain or dedicated diffusion panel) to soften the light. Side lighting or backlighting often works best, creating appealing shadows and highlighting textures.
Reflectors: Use a simple white card or a dedicated reflector to bounce light back onto the shaded side of your food, filling in shadows and adding a lovely catchlight without introducing harshness.
Post-Processing for Perfection
Even with perfect camera settings, a touch of post-processing can elevate your food photos from great to truly exceptional.
RAW vs. JPEG: Always shoot in RAW format if your camera allows. RAW files contain much more image data, giving you greater flexibility to adjust exposure, white balance, colors, and sharpness without degrading image quality during editing. JPEG files, while smaller, have less latitude for extensive adjustments.
Key Adjustments: In editing software (Lightroom, Photoshop, Capture One), focus on subtle adjustments: fine-tuning exposure and contrast, increasing vibrance and saturation (judiciously), sharpening details, and correcting any remaining white balance issues. A slight clarity boost can also enhance textures, making your food look even more delectable.
Conclusion: Practice Makes Perfect
Capturing vibrant, mouth-watering food adventure photos is a blend of technical know-how and artistic vision. By mastering your camera’s aperture, shutter speed, ISO, and white balance, and understanding how light interacts with your subject, you’ll be well on your way to creating images that not only document your culinary travels but also make viewers crave every bite. Experiment, observe, and most importantly, enjoy the delicious process!