


What mobile lighting trick elevates Visual Bites from amateur to foodie-worthy?

Transforming Your Visual Bites with Superior Mobile Lighting
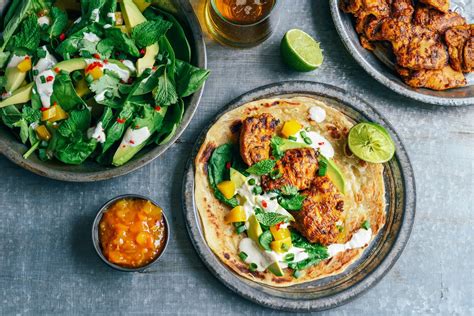
In the vibrant world of food sharing, a picture truly is worth a thousand calories. Yet, many aspiring food photographers struggle to capture the true deliciousness of their culinary creations, often resulting in bland, unappetizing mobile snaps. The secret to elevating your ‘Visual Bites’ from mere amateur attempts to professional, foodie-worthy masterpieces isn’t a fancy camera or expensive equipment; it’s a simple, often overlooked mobile lighting trick that harnesses the power of your surroundings.
The Game-Changing Trick: Diffused Natural Window Light
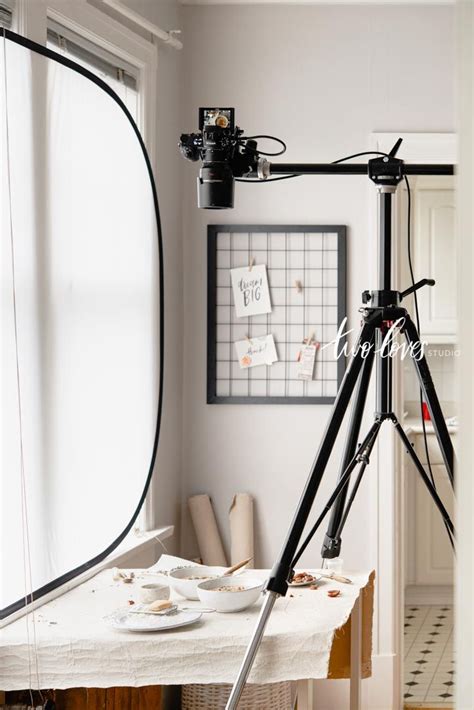
Forget harsh overhead lights or the blinding, flat glow of your phone’s flash. The single most impactful mobile lighting technique you can employ is utilizing diffused natural light from a window. Why natural light? Because it’s soft, directional, and provides a beautiful, even illumination that mimics professional studio lighting setups without the cost.
Direct sunlight, while natural, can be too intense, creating harsh shadows and overexposed highlights. The “trick” lies in diffusing that light. This means using a window that isn’t receiving direct, beaming sun, or, even better, placing a sheer curtain or a white sheet over the window to soften the light even further. This creates a large, soft light source that wraps around your food, enhancing textures and colors beautifully.
Mastering Your Mobile Lighting Setup
Step 1: Find Your Light Source
Locate a window in your home that offers indirect light. North-facing windows often provide consistent, soft light throughout the day. If your only option is a window with direct sunlight, wait for an overcast day, or use a sheer white curtain to diffuse the light.
Step 2: Position Your Food
Place your dish near the window. Ideally, the light should come from the side or slightly behind your food (backlighting or side-lighting). This creates depth, highlights textures, and adds a beautiful rim light to your subject. Avoid placing the food directly facing the window, as this can result in flat, uninteresting images.
Step 3: Introduce a Reflector (DIY is Best!)
Even with diffused natural light, one side of your food might appear darker due to shadows. Combat this by using a simple reflector on the opposite side of the window. This doesn’t require specialized gear; a white piece of foam board, a white napkin, a sheet of paper, or even a silver car sunshade can bounce light back onto your food, filling in shadows and creating a more balanced exposure.
Elevate Your Visual Bites Further
Once you’ve mastered diffused natural light, consider these additional tips:
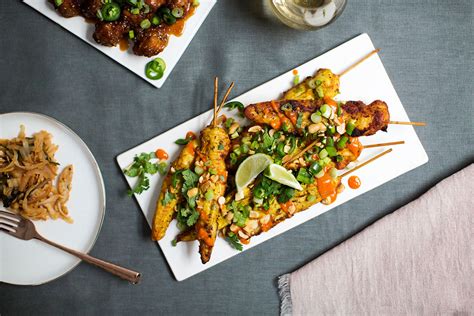
- Angles: Experiment with different angles. Overhead shots work well for bowls and flat lay arrangements, while a 45-degree angle can emphasize layers and height.
- Composition: Use the rule of thirds, leading lines, and interesting props (cutlery, ingredients) to enhance your photo’s appeal without distracting from the main dish.
- Minimal Editing: Use your phone’s editing tools sparingly. Adjust brightness, contrast, and saturation slightly. The goal is to enhance, not to fake.
Common Pitfalls to Avoid
- Direct Phone Flash: This is almost always a recipe for disaster, creating harsh shadows, flat images, and unnatural colors.
- Mixed Light Sources: Avoid using natural light and artificial overhead lights simultaneously. They have different color temperatures, leading to strange color casts in your photos.
- Clutter: Keep your background clean and uncluttered so the food remains the star.
Conclusion
The journey from amateur food photos to “foodie-worthy” Visual Bites doesn’t have to be complicated or expensive. By embracing the simple yet powerful trick of diffused natural window light, you unlock the potential to showcase your culinary creations in their best possible light. Experiment, practice, and watch as your smartphone food photography transforms, captivating your audience and truly doing justice to the deliciousness on your plate.


