


What post-production Visual Bites tips maximize gourmet dish appeal for foodies?

Transforming Culinary Masterpieces into Digital Delights
In the competitive world of food blogging and culinary content creation, simply cooking an exquisite dish is only half the battle. Presenting it visually, especially for a discerning audience of foodies, requires an artistic touch that often extends beyond the camera lens. Post-production ‘Visual Bites’ are the secret ingredient to making gourmet dishes not just look good, but irresistibly craveable. This article delves into key editing techniques that can elevate your food photography, ensuring every pixel contributes to a mouth-watering experience.
The Power of Color Correction and White Balance
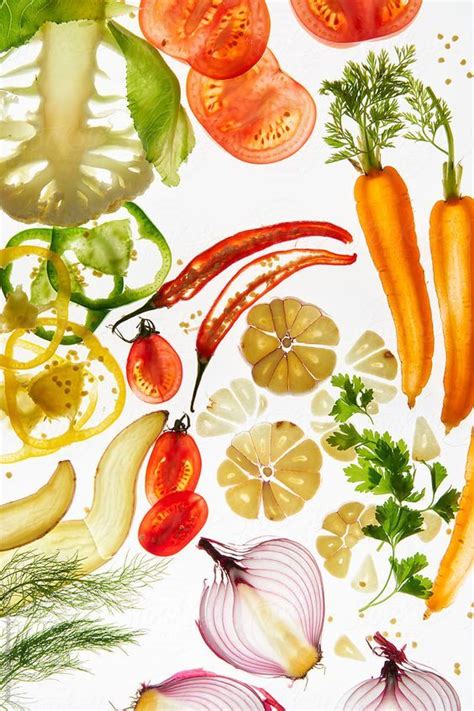
The first and most crucial step in post-production is ensuring accurate colors. A dish might look vibrant in person, but camera sensors can sometimes misinterpret hues, especially under various lighting conditions. Adjusting the white balance is paramount to eliminate unnatural color casts (e.g., yellowish indoor light or bluish outdoor light) and restore the true, appetizing colors of your ingredients. Following this, fine-tuning individual color channels can make a significant difference. Boost the saturation of reds in a perfectly cooked steak or enhance the green vibrancy of fresh herbs, but always with a light hand to avoid an artificial look.
Highlighting Textures and Details with Sharpening
Gourmet food is all about intricate details and appealing textures. A crisp crust, a glistening sauce, or the delicate layers of a pastry – these are what draw a foodie in. Post-production sharpening tools can meticulously enhance these features. Apply sharpening selectively, focusing on the main subject rather than the entire image, to bring out the fine details without introducing unwanted noise or harshness. The goal is to make textures pop, inviting the viewer to almost feel the dish through the screen.

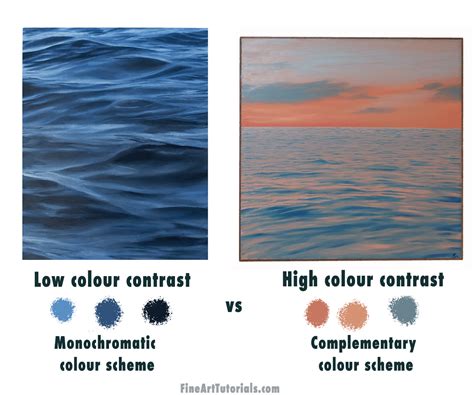
Mastering Contrast and Clarity for Depth
A flat image lacks appeal. Contrast and clarity are essential for adding depth and dimension to your food photos. Increasing contrast can make shadows deeper and highlights brighter, giving the dish more presence. Clarity, on the other hand, enhances mid-tone contrast, making textures appear more defined without over-sharpening fine details. Use these adjustments to sculpt the light and shadow, guiding the viewer’s eye to the most appealing parts of your gourmet creation. Be mindful not to overdo it, as excessive contrast can crush shadows or blow out highlights, losing valuable detail.
Selective Adjustments for Pinpoint Perfection
Not every part of your image needs the same treatment. Selective adjustments are a game-changer for food photography. Using masks and brushes, you can brighten specific areas, darken distracting elements, or even tweak the color of a particular ingredient. For instance, you might want to subtly brighten a garnish, add a touch more warmth to a sauce, or reduce the brightness of a background element that’s pulling focus away from the main dish. This precision allows you to sculpt the light and colors exactly where they are needed most.
Removing Distractions and Enhancing Composition
Even with careful styling, minor imperfections can creep into your shot. A stray crumb, an unwanted reflection, or a smudge on the plate can detract from the gourmet appeal. Post-production is the perfect time to clean up these visual nuisances. Tools like the spot healing brush or clone stamp can seamlessly remove distractions, ensuring your dish looks pristine. Furthermore, consider cropping the image to refine the composition, making sure the plating and focal points are perfectly balanced and compelling.

The Final Polish: Vignettes and Subtle Effects
Once the core adjustments are made, a subtle vignette can draw the viewer’s eye inward towards the dish, adding a professional touch. A gentle darkening around the edges can create a spotlight effect on your culinary masterpiece. Experiment with minor stylistic touches like a slight desaturation of the background or a very subtle split toning to imbue your image with a unique mood or signature style. Remember, the goal is enhancement, not transformation into something unnatural. Every adjustment should serve to make the gourmet dish look its absolute best, ready to tantalize the palates of discerning foodies.


