


What specific lighting makes food Visual Bites pop for real foodies?
For true culinary connoisseurs, the journey of enjoying a dish begins long before the first bite – it starts with the eyes. In the era of digital sharing and visual storytelling, how a dish is presented can elevate it from mere sustenance to an object of desire. But what precisely is the secret ingredient that transforms a delicious meal into a tantalizing ‘Visual Bite’ that truly pops for discerning foodies? The answer, unequivocally, lies in mastering specific lighting techniques.
Embracing the Magic of Natural Light
Often, the most stunning food photography relies on the simplest and most accessible light source: natural light. Soft, diffused natural light is a food photographer’s best friend because it accentuates textures, colors, and shadows without being overly harsh. Think of a bright, overcast day or a well-lit window. The key is to avoid direct sunlight, which creates stark contrasts and unflattering hot spots.

Positioning your food near a large window, slightly to the side or behind the dish, is a classic technique. This side or backlighting creates beautiful highlights and depth, making ingredients look fresh and inviting. To further refine natural light, use a sheer curtain as a diffuser or place a white foam board opposite the window to bounce light back into the shadows, softening them and revealing more detail.
Harnessing Artificial Lighting for Consistent Brilliance
While natural light is ideal, it’s not always available or consistent. This is where artificial lighting comes into play, offering unparalleled control and repeatability. The goal remains the same: emulate the softness and quality of natural light. Softboxes, large diffusers, and continuous LED panels are popular tools for achieving this.
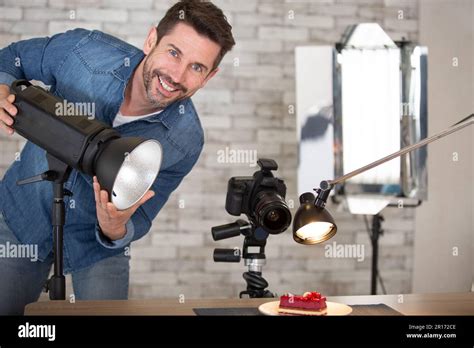
When using artificial light, consider its size relative to your subject. A larger light source creates softer shadows. Positioning is crucial; typically, an off-camera light source to the side or slightly behind the food, often paired with a reflector on the opposite side, will produce the most appealing results. Experiment with the height and distance of your light to find the sweet spot that makes your dish shine.
The Power of Direction: Shaping Form and Texture
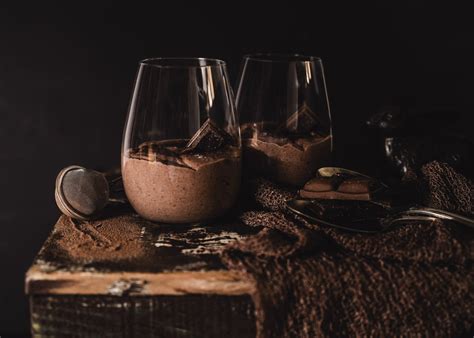
Beyond simply having light, its direction profoundly impacts how a dish is perceived. Backlighting, where the light source is directly behind the food, creates a beautiful rim light that makes liquids glow and adds a sense of drama and freshness, especially for transparent ingredients or delicate garnishes.
Side lighting, coming from a 45 to 90-degree angle, is excellent for emphasizing texture and dimension, making a crusty bread or a layered cake truly “pop.” Avoid direct front lighting, as it tends to flatten dishes and wash out details, making the food look less appetizing and less three-dimensional.
Color Temperature and White Balance: The True Hues
The color temperature of your light source (measured in Kelvin) plays a critical role in the accurate portrayal of food. Warm light (lower Kelvin) can make food look cozy and inviting, while cooler light (higher Kelvin) can appear fresh and crisp. However, inconsistencies can lead to unappetizing color casts.

Maintaining a consistent white balance, whether through your camera’s settings or during post-processing, is paramount. This ensures that whites appear white and that the vibrant colors of your ingredients are rendered faithfully, making them look as delicious in the photograph as they do in real life.
Reflectors and Diffusers: Sculpting the Light
These humble tools are indispensable in controlling and shaping light. Reflectors (like white foam boards, silver cards, or specialized reflectors) bounce light back into shadowy areas, lifting details and reducing harsh contrasts. Diffusers (like sheer fabric or professional scrims) soften direct light, turning a harsh beam into a gentle, enveloping glow.
By strategically placing these tools, you can sculpt the light around your dish, highlighting specific elements and creating a more professional, mouth-watering result. They allow for subtle adjustments that can make all the difference in achieving that coveted “visual pop.”
Conclusion: Crafting Irresistible Visual Bites
Transforming food into irresistible visual bites for real foodies is an art, and lighting is its most powerful brushstroke. Whether you’re harnessing the gentle embrace of natural light or meticulously crafting an artificial setup, understanding diffusion, direction, color temperature, and the strategic use of reflectors and diffusers is key. By consciously manipulating light, you can bring out the best in every dish, making it not just seen, but truly craved. Experiment, observe, and let the light guide your culinary creations to a whole new level of visual deliciousness.


