


What specific lighting makes ‘Visual Bites’ food photos irresistible?
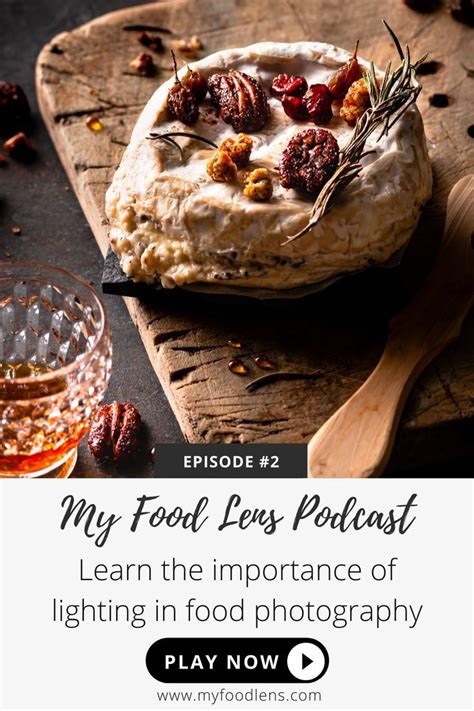
The Illuminating Secret Behind Irresistible Food Photos
Creating ‘Visual Bites’ – food photographs so compelling they make viewers almost taste the dish – hinges on many factors, but none is as critical as lighting. It’s the silent storyteller, shaping mood, revealing texture, and highlighting vibrant colors. Without thoughtful illumination, even the most exquisitely prepared dish can fall flat on camera. Understanding and mastering specific lighting techniques is the true secret to transforming a mere snapshot into an irresistible visual feast.
Harnessing the Magic of Natural Light
For many food photographers, especially those just starting or working from home, natural light is the gold standard. The soft, diffuse glow of a window can be incredibly flattering to food, mimicking daylight and creating a fresh, authentic feel. The key is not direct sunlight, which can be harsh and create deep, unflattering shadows, but rather indirect light.
Positioning your food near a large window, slightly off to the side, allows for beautiful side or backlighting that emphasizes texture and shape. To soften this light further and minimize harsh shadows, use a white diffuser (a translucent material placed between the light source and the food) or bounce cards (white foam boards or reflectors) on the opposite side to fill in shadows and add gentle illumination. Experimenting with distance from the window also plays a crucial role; closer often means softer light, while further away can create more dramatic contrasts.

Mastering Artificial Illumination for Consistent Visual Bites
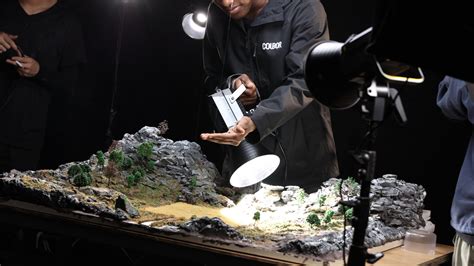
While natural light is wonderful, it’s not always available or consistent. This is where artificial lighting, such as strobes or LED panels, becomes indispensable. The goal with artificial light is often to replicate the quality of beautiful natural light. Softboxes are your best friend here. These modifiers diffuse and soften the light source, creating large, gentle light that mimics an overcast sky or a large window.
Positioning is crucial: often, a large softbox placed to the side or slightly behind the food, angled down, creates a beautiful wrap-around light that defines edges and creates alluring highlights. Using grids on softboxes can help control light spill and focus the illumination precisely where you want it. For ultimate control and portability, battery-powered strobes or continuous LED lights offer flexibility in any environment, ensuring your ‘Visual Bites’ are consistently stunning, regardless of the time of day or weather.
The Power of Light Direction: Backlighting and Side Lighting
Backlighting for Drama and Sparkle
Backlighting, where the light source is placed directly behind the food, is arguably one of the most effective techniques for making food irresistible. It creates a beautiful rim light around the edges of your dish, making it pop from the background and adding a sense of depth and dimension. It’s particularly effective for translucent elements like liquids, sauces, or garnishes, making them glow. When using backlighting, you’ll almost always need a reflector or fill light in front to bounce some light back onto the front of the food, preventing it from becoming a silhouette.
Side Lighting for Texture and Form
Side lighting, where the light source comes from the side of the dish, is excellent for enhancing texture. The light grazes across the surface, casting subtle shadows that define contours and surfaces—think of the crust of bread, the layers of a pastry, or the grains of rice. A single light source from the side can be highly dramatic, while adding a reflector on the opposite side can soften the contrast and lift shadows, creating a more balanced yet still textural image. Both backlighting and side lighting are fundamental in creating the desired mouth-watering effect of ‘Visual Bites’.
The Subtle Art of Shadows and Highlights
Irresistible food photography isn’t just about illuminating the subject; it’s about strategically using shadows and highlights to create depth, mood, and visual interest. Soft, gradual shadows add dimensionality and make the food appear more three-dimensional and inviting. Harsh, dark shadows, conversely, can obscure details and make the dish look unappetizing. Conversely, controlled highlights can draw the eye to key elements, such as a glistening glaze or a perfectly seared edge.
Understanding how light falls and creates these elements is crucial. A single, well-placed soft light source usually yields the most appealing shadows. Tools like black flags or gobos can be used to block light and deepen shadows in specific areas, adding drama and guiding the viewer’s eye through the composition. It’s the interplay between light and shadow that gives ‘Visual Bites’ their captivating appeal.

Essential Tools and Practical Considerations
Beyond the light source itself, several tools are indispensable for mastering lighting. Reflectors (white, silver, gold) and diffusers are fundamental for shaping and softening light. Scrims can be used overhead to reduce harsh ambient light, while flags (black cards) block light to create shadows or prevent lens flare. White balance is another critical factor; ensuring accurate color reproduction makes food look its best and most natural. A proper white balance setting will prevent your food from looking too yellow, blue, or green, preserving its true, appealing colors.
Conclusion
Ultimately, making ‘Visual Bites’ food photos irresistible boils down to a profound understanding and skillful manipulation of light. Whether it’s the gentle embrace of diffused natural window light, the consistent power of a studio softbox, or the dramatic flair of backlighting, each specific lighting choice contributes to the final appetizing result. By controlling the direction, quality, and intensity of light, along with the strategic use of shadows, photographers can transform simple ingredients into tantalizing imagery that not only looks good but tastes good to the eye.


