


What visual cues confirm perfect doneness for pan-seared scallops with a golden crust?

Unlocking the Secret to Perfectly Seared Scallops
Pan-seared scallops are a culinary delight, known for their sweet, delicate flavor and tender texture. The ultimate goal is a beautiful golden-brown crust that gives way to a perfectly cooked, succulent interior. Achieving this isn’t difficult, but it requires paying close attention to specific visual cues throughout the cooking process. Forget timers alone; your eyes are your best tools in the quest for scallop perfection.
The Critical First Step: Dry Scallops
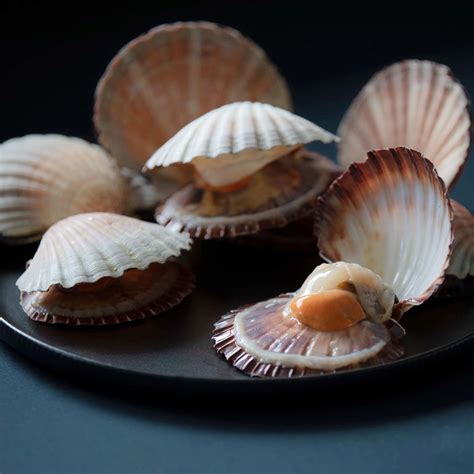
Before any heat even touches your scallops, ensuring they are thoroughly dry is paramount. Excess moisture will steam the scallops instead of searing them, preventing that coveted golden crust from forming. Pat them rigorously with paper towels, even letting them air dry in the refrigerator for 15-20 minutes if time permits. They should feel almost tacky to the touch.

Observing the Sear: From Raw to Golden
Once your pan is screaming hot and lightly oiled, gently place the scallops in a single layer, ensuring not to overcrowd the pan. This is where the magic begins, and your visual inspection truly starts.
The Developing Crust (First Side)
As the scallops cook on the first side, you’ll notice a distinct change in color. The translucent, pearly white flesh that’s in contact with the pan will gradually transform. You’re looking for the edges to start turning opaque and a beautiful golden-brown ring to form around the bottom perimeter of the scallop. Resist the urge to peek too early or move them! This browning is critical for flavor and texture.
The Flip and the Reveal
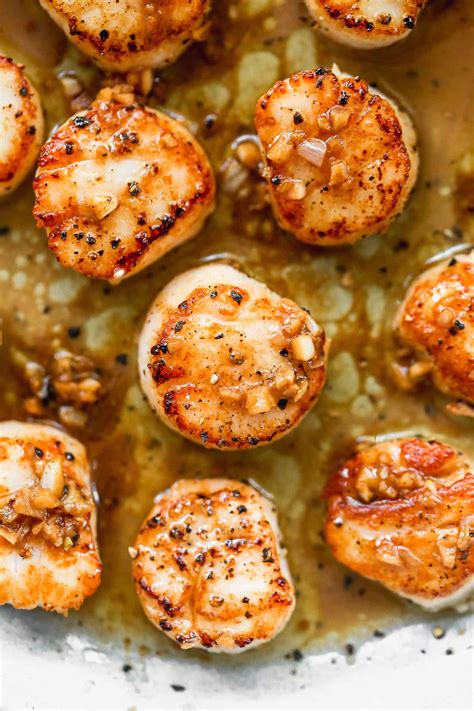
Typically, after about 1.5 to 2 minutes (depending on size and heat), it’s time to flip. The most satisfying visual cue here is the underside: it should be a deep, rich golden-brown, almost caramelized. This is your golden crust, indicative of a successful sear. If it’s pale, increase your heat slightly for the next batch or let them cook a bit longer on the first side. After flipping, the second side will cook much faster, usually for just 1-1.5 minutes.

Confirming Perfect Doneness: Key Visual Cues
Once both sides have developed that beautiful crust, focus on the interior and overall appearance to confirm doneness.
- Opaque Sides: The most important visual cue for doneness is that the scallops should be opaque throughout their sides. The raw, translucent sheen should be gone, replaced by a uniform milky white color.
- Slight Translucency in the Center (Optional, for some): For those who prefer their scallops incredibly tender and juicy, a very slight, barely perceptible translucency in the absolute center is ideal. This indicates they haven’t been overcooked and retain maximum moisture. If they are completely opaque from edge to edge, they are fully cooked but might be trending towards slightly less tender.
- The “Pop” Test (Visual confirmation): As scallops finish cooking, their muscle fibers contract slightly, causing them to plump up a bit. They will look full and round, not shriveled or deflated.
Troubleshooting: What Under- or Overcooked Scallops Look Like
- Undercooked: If your scallops still look largely translucent on the sides or appear squishy and jiggly, they need more time. The crust might be pale or uneven.
- Overcooked: Scallops that are overcooked will shrink significantly, appear entirely opaque, dense, and feel rubbery. The beautiful golden crust might even turn dark brown or burnt.

The Art of the Perfect Sear
Mastering the visual cues for pan-seared scallops takes a little practice, but once you know what to look for, you’ll consistently achieve that mouth-watering golden crust and tender, sweet interior. Remember to start with dry scallops, use a hot pan, and trust your eyes over the clock. Enjoy the delicious results!


