Which Visual Bites composition rules boost real foodie recipe saves most?

The Power of Visuals in Food Media
In the bustling digital landscape of food blogging and social media, a recipe’s visual appeal is often the first, and sometimes only, chance to capture a foodie’s attention. Stunning photography transforms a simple ingredient list into an irresistible culinary invitation. For real foodies, who often save recipes for future endeavors, the visual presentation isn’t just about beauty; it’s about conveying freshness, deliciousness, and the promise of a satisfying meal. Understanding and applying specific composition rules can drastically increase your recipe’s ‘save’ rate, turning casual browsers into engaged followers.
Mastering Composition for Maximum Appeal
Effective visual composition is the backbone of captivating food photography. It’s about arranging elements within your frame to create a harmonious, engaging, and mouth-watering image. By strategically guiding the viewer’s eye, you can highlight the star of the show—your delicious dish—and make it truly unforgettable.
1. The Rule of Thirds and Dynamic Placement
One of photography’s most fundamental rules, the Rule of Thirds suggests placing your subject or key elements along the grid lines or at their intersections, rather than dead center. This creates a more dynamic and visually interesting image, allowing the viewer’s eye to explore the frame. For food, this could mean positioning a hero ingredient or the most appealing part of a dish slightly off-center.
2. Harnessing Leading Lines and Depth
Leading lines—be it the edge of a cutting board, the arrangement of cutlery, or even the natural flow of ingredients—can draw the viewer’s eye directly to your main subject. Coupled with a shallow depth of field, which blurs the background to emphasize the foreground, these techniques add professionalism and allure, making your food appear tantalizingly within reach.

Emphasizing Key Elements: Focus, Space, and Detail
Beyond basic layout, how you manage space and showcase intricate details can significantly impact a foodie’s perception of your recipe.
3. Strategic Use of Negative Space
Sometimes, less is more. Negative space (the empty space around and between the elements of an image) allows your subject to breathe and prevents the image from looking cluttered. It helps the main dish stand out, conveying elegance and simplicity, which can be highly appealing to those seeking clear, easy-to-follow recipes.
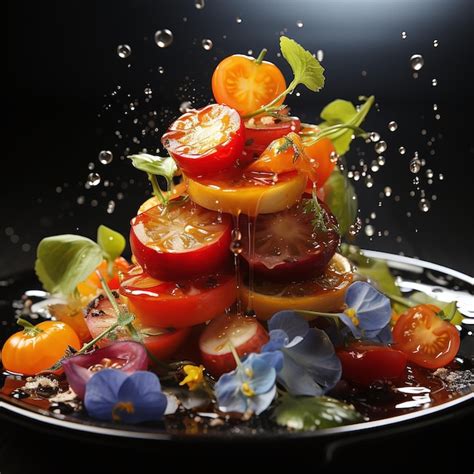
4. Capturing Texture and Detail
Real foodies appreciate the nuances that make a dish special. Close-up shots that highlight the crispy skin of roasted chicken, the glistening sauce on pasta, or the fluffy interior of a cake can evoke a strong sensory experience. These details tell a story about the food’s quality and preparation, making the recipe seem more authentic and desirable.
Color, Lighting, and Prop Styling for Authenticity
These elements are crucial for setting the mood and enhancing the natural beauty of your food.
5. The Psychology of Color and Contrast
Vibrant, natural colors are key. Use complementary colors in your plating or background to make your food pop. High contrast (e.g., bright food against a dark background, or vice-versa) can create drama and draw immediate attention. Think about the freshness conveyed by bright greens or the warmth of golden-brown baked goods.
6. The Art of Natural Lighting
Good lighting is perhaps the single most important factor in food photography. Natural, soft, diffused light (often from a window) is generally preferred as it illuminates food beautifully without harsh shadows or unnatural color casts. Backlighting or sidelighting can add dimension and sparkle, making liquids gleam and textures pop.
7. Thoughtful Prop Styling for Storytelling
Props should enhance, not distract. Use subtle, relevant items like rustic cutlery, a linen napkin, or a few key ingredients from the recipe to add context and tell a story. The goal is to create an authentic, approachable scene that makes the viewer imagine enjoying the dish themselves.

Angles and Perspective: Presenting Your Dish
The angle from which you photograph your dish drastically changes its perception.
8. Choosing the Right Angle
- Overhead (Flat Lay): Ideal for dishes with beautiful tops, intricate plating, or when showcasing multiple items in a scene (e.g., a breakfast spread).
- 45-Degree Angle: Mimics how we naturally view food at a table, great for showing depth and volume, like a stack of pancakes or a bowl of soup.
- Eye-Level/Close-up: Best for highlighting specific textures, layers, or the height of a dish (e.g., a towering burger or a layered cake).
Ultimately, the composition rules that boost real foodie recipe saves most are those that make the food look utterly irresistible, authentic, and easy to recreate. By focusing on dynamic layouts, emphasizing texture, utilizing natural light, and thoughtful storytelling through props and angles, you can transform your recipe photos into powerful tools for engagement and culinary inspiration.